
Section Two: Creating Amazon S3 bucket and configuring Splunk data connection
Now we have successfully created a connection to Amazon in our Data Management app. We can continue onto the next phase which is to create an Amazon S3 bucket and then configure a dataset in Splunk data management to be able to route to that bucket.
Creating an Amazon S3 bucket for Cisco ASA
- From your AWS console.
Search for and select Amazon S3.See example below:

- From the Buckets screen.
Click the Create Bucketbutton near the middle of the screen.
There is a quite a lot to know about using Amazon S3. This workshop will not go into any of the details about it but for this lab all we will say is it is a great low cost storage service which provides near limitless storage and hugely available up time and redundancy. More information on Amazon S3 can be found here
- Find the section where it says Bucket Name.
Copy and paste the below bucket name, appending your name at the end
You must have splunk- at the start of your bucket name. Otherwise the permissions we have configured as part of the role in this workshop will not allow you to write and read files from it. Please use the suggested format in the lab for S3 bucket name.
splunk-cisco-asa-s3-log-storage-<yournamehere>Leave all remaining defaults, scroll to the bottom andclick Create Bucket.
You should now see a screen similar to the below:

We can leave the Amazon S3 tab open and jump back into Splunk as for our next step we need to create a dataset which we will use for routing data too.
Creating a Splunk dataset for Cisco ASA logs
- From the Splunk console, if not already open go to the Data Management app by
clicking the Splunk Cloud logo followed by the Data Management appon the left-hand menu. - From here we will now go to a new section.
Click Datasetsoption on the left-hand menu. See example below:
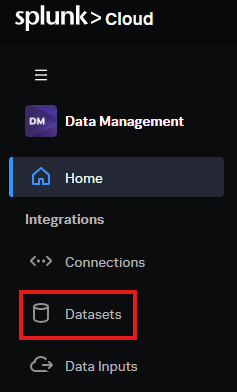
From here we will already see a default dataset which is configured for Machine Data lake.. More on that later!
- When ready,
click the blue Create datasetbutton on the top right-hand side.
WOW! Look at how many different options we have here for dataset creation. This is the list of all of the different types of data Splunk is able to route and search from today, with more coming in the future. Isn't that cool!
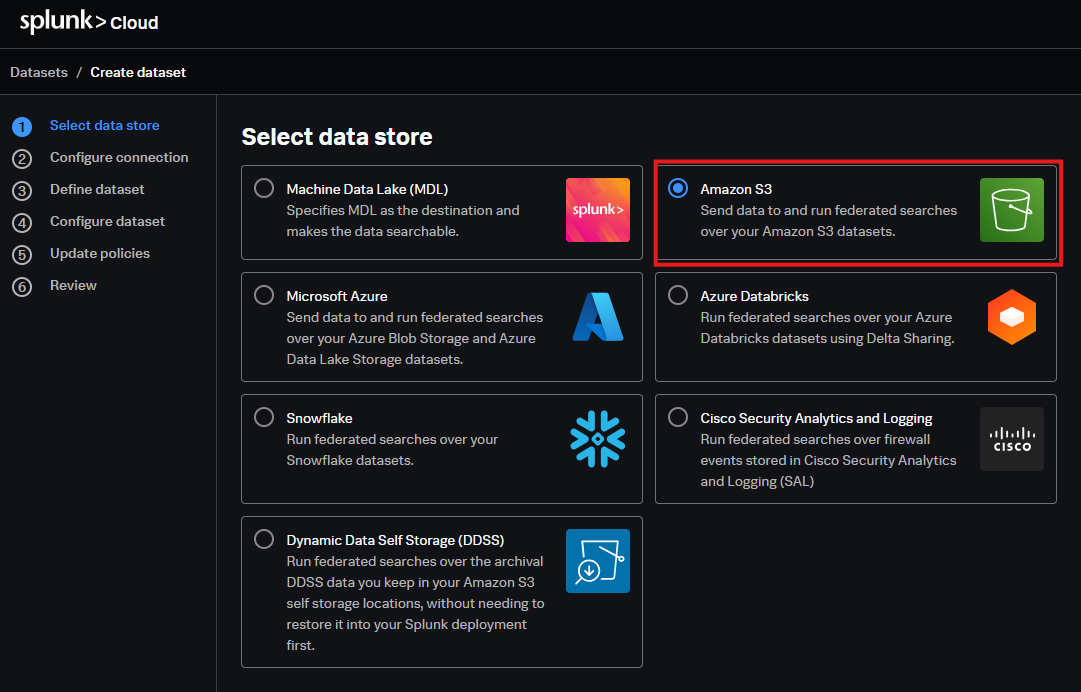
- For this lab we will be using Amazon S3 again.
Select the Amazon S3 optionas shown below:
- When ready,
click the nextbutton. Select our connection we created earlierin the previous part of lab2 from the drop down.- Feel free to review and
click nextwhen ready.
This is where we can define the dataset type again between searching and writing data to it.
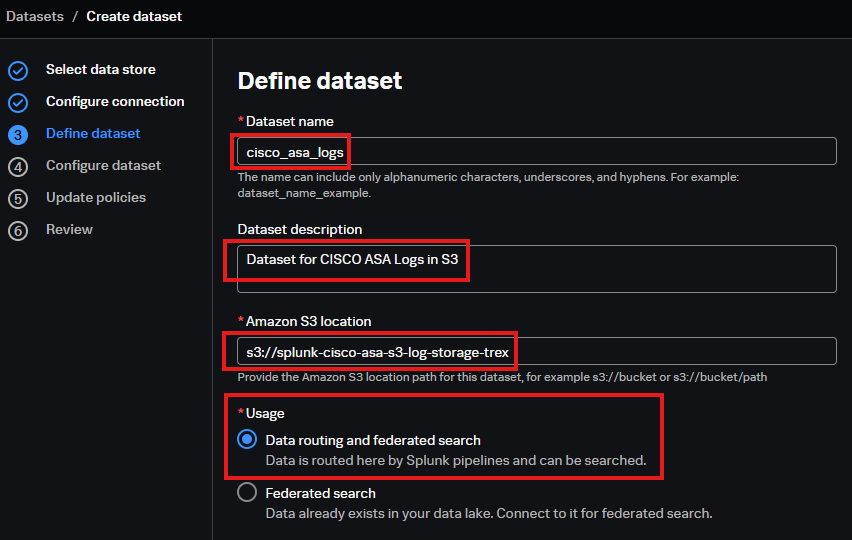
Fill in the options as mentioned below.See example filled out below:
- Dataset name:
cisco-asa-s3-logs - Dataset Description:
Dataset for CISCO ASA Logs in S3 - Amazon S3 location: `s3://splunk-cisco-asa-s3-log-storage-
` - Usage Radio buttons:
Data routing and federated search
- When ready,
click nextto continue.
Now, this is where things really get exciting! There are lots of different options and nuances here. We cannot cover off all options apart from what we are going to use in the lab. For more detailed information on configuring Splunk datasets. See HERE
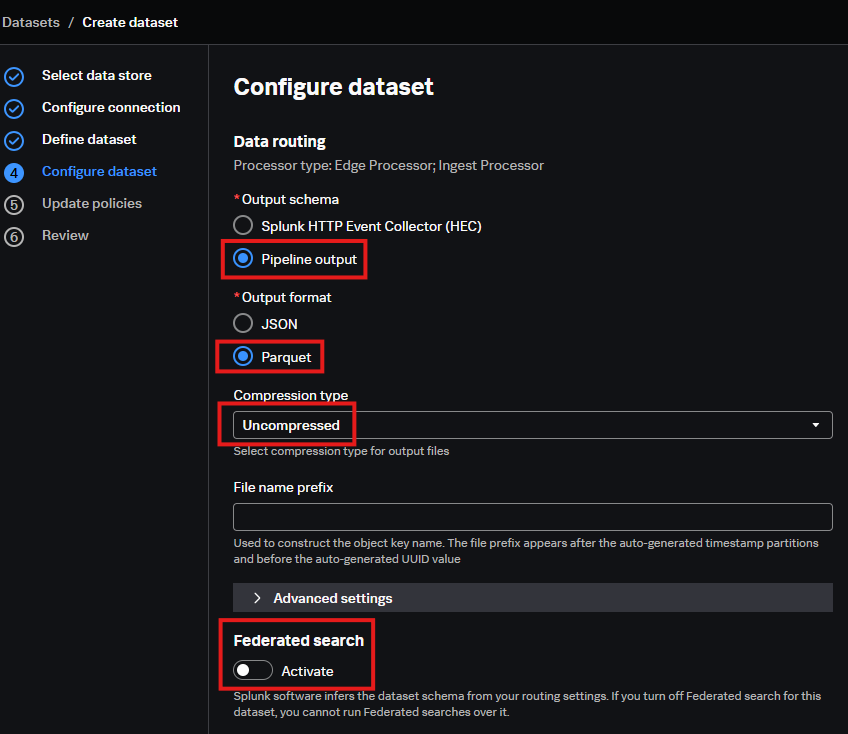
- Fill out the Configure dataset options as described below:
- Output schema:
Pipeline output - Output format:
Parquet - Compression type:
uncompressed - File name prefix:
leave blank - Advanced settings:
leave as is - Federated Search Activate:
toggle NO
Some quick notes on what we selected and why for this workshop.Output schema:Pipeline output was selected as we are using this dataset for Ingest Processor and this is the best option for thatOutput format:Parquet was selected as this is a binary format which is great for reducing storage size on S3 especially for long term rention. Federated search can also search parquet. Note though if you want to manually ingest into Splunk later on using a PULL (eg Splunk Add-on for Amazon S3) then the parquet format will need to be converted to JSON. Keep this in mind in your onw scenario.Compress Type:Selected uncompress as we wanted to quickly and easily show you the results in S3File name and prefix:You can add a prefix to the parquet output filename. For this lab we won't need it.Federated Search Activate:Although we could use federated search as a good use case here for this lab, we will be doing very similar capabilities on other labs later on so to save time and confusion we will leave it to those labs later on. So we turned it off for this lab.
See example of filled in page below:
- Review and when ready,
click next Select noon the KMS key screen. We are not using KMS keys for this lab. ALthough you probably should in a production environment!Click Generate policiesbutton.
From here you will see a resource access policy which is generated for AWS S3 access. Usually you would have to copy that policy and attach it to our role we looked at earlier. Because it is a workshop we have taken some of the hard work out for you and pre-configured the role with the policies required for this lab.
But don't be lazy and have a look at it still. You will note this policy is allow read and write access to the S3 bucket we selected for our dataset.
- Once ready,
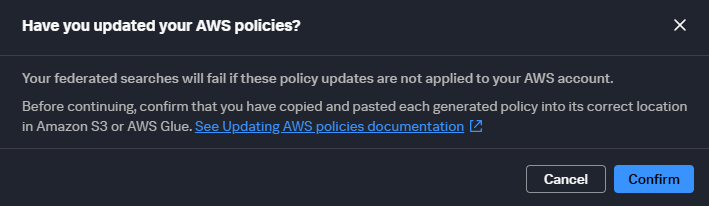
click next - You will be prompted with a reminder to update those policies. Read the reminder and
Click confirmwhen ready. See example below:
- Do a final review of your dataset creation and
Click Create Datasetwhen ready.
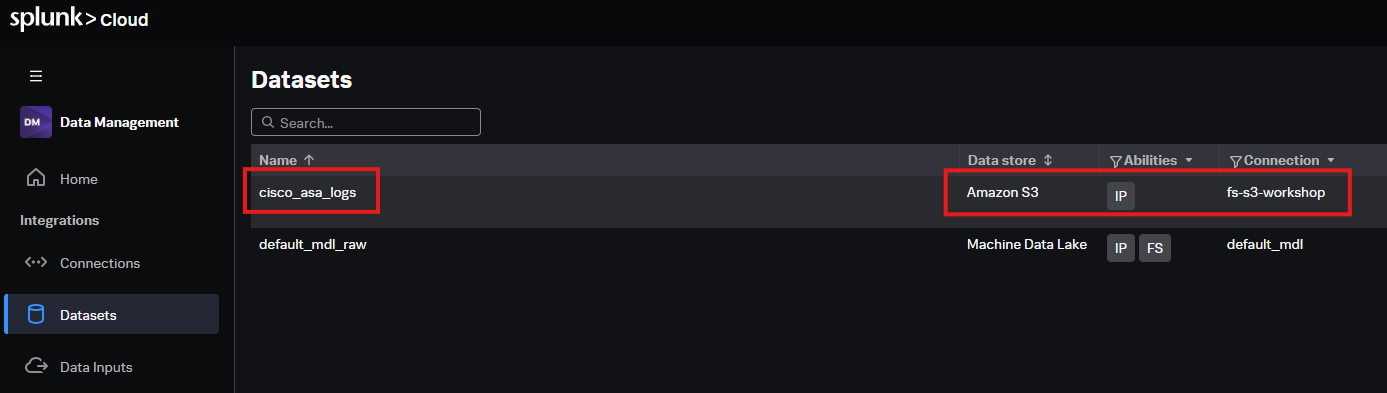
You should now see a second dataset which has been created in our list. See example below:
Before we move onto section three of our lab let's now go back to our SCS tenancy and check if we have a new destination available for our Ingest Processor!
Validate new Ingest Processor Destination
- From our SCS tenancy page
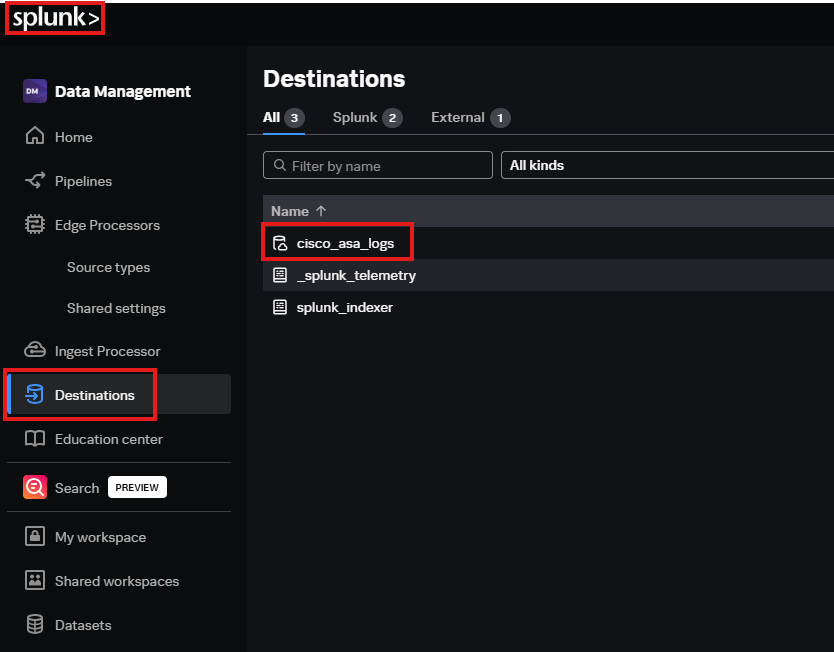
select the Splunk logotop left-hand side. - Next click the Destinations option on the left hand menu
You should now see we have a new destination for our cisco-asa-s3-logs! See example screenshot below:
Congrats, you have now setup your first dataset destination for Amazon S3! Next we will continue on in section three building out our Ingest Processor pipeline to use our new Amazon S3 destination.