
Now we have been through the basics of CloudFront Access logs and Amazon Glue tables it is now time to see how these come together with Splunk to build out our first Federated Search!
Creating CloudFront Dataset
Its time to create another dataset, this time for CloudFront Access logs.
- From your Splunk Cloud stack,
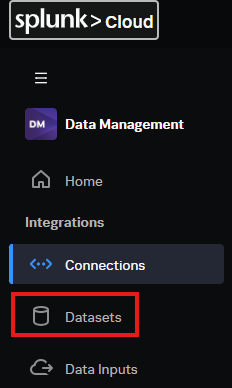
click the Splunk Cloud Icon. Select Data Managementapp.Select Datasetssection on the left hand Splunk menu. See example below:
Click the blue Create dataset button.- Like before,
Select Amazon S3from the list.Click Next Select the connection we createdOnce selected,Click Next
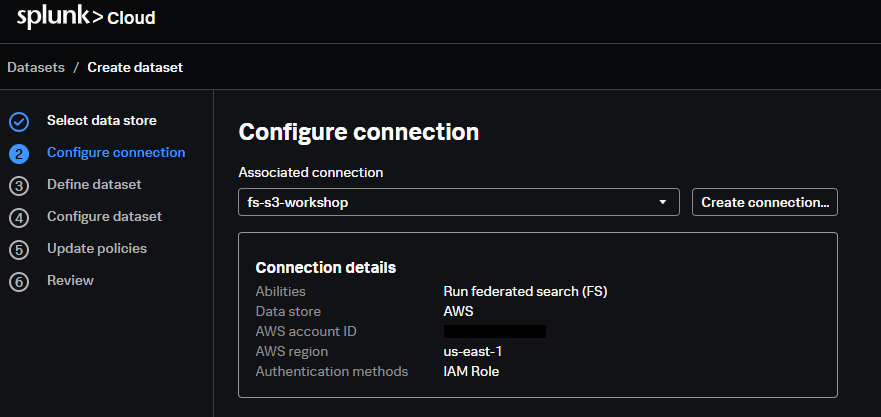
Copy and paste the below into the Dataset Name field
cloudfront_access_logsFor the next step of Amazon S3 location we need to go back to the AWS console.
- From your AWS console,
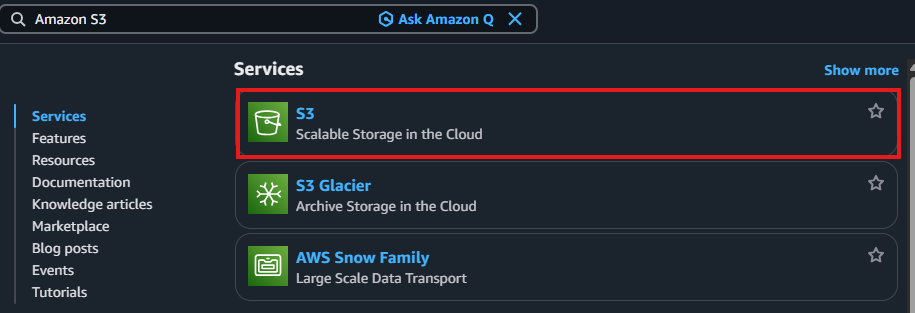
search for and select Amazon S3.
- From here
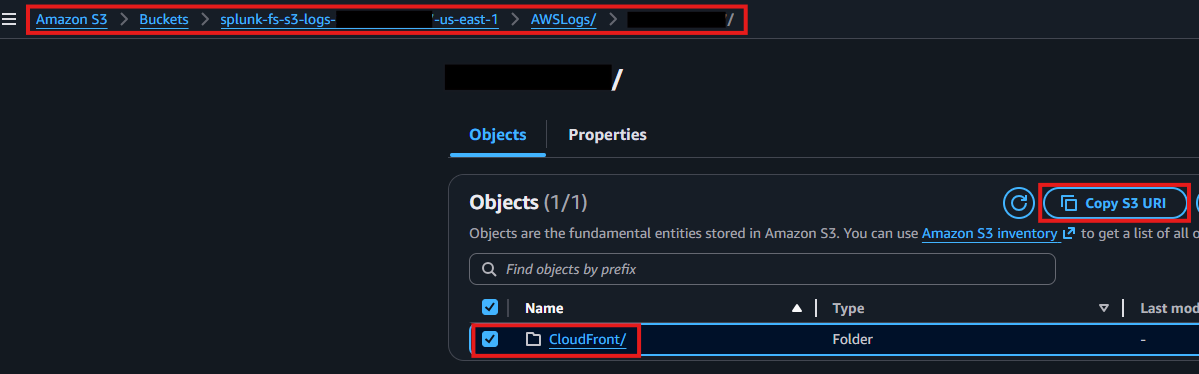
select the logs bucket for our lab.Should be splunk-fs-s3-logs-{account-id}-{region} - Using the links on the folder
select the folders till you see the CloudFront folder. Tick the box for CloudFrontandSelect Copy S3 URI.See example below
Paste the S3 URI back on the Splunk screen for Amazon S3 location.Select the Federated search radio button and Click Next- Splunk asks you which type of catalog you use for managing your data. For this lab we will be using the AWS Glue method.
Select AWS Glue
After selecting AWS Glue, a whole bunch of new fields appear. Most of the fields information can be obtained by looking at the AWS Glue catalog settings we have created for you in this lab.
- From your AWS console. Go back to the AWS Glue tab or re-open it and
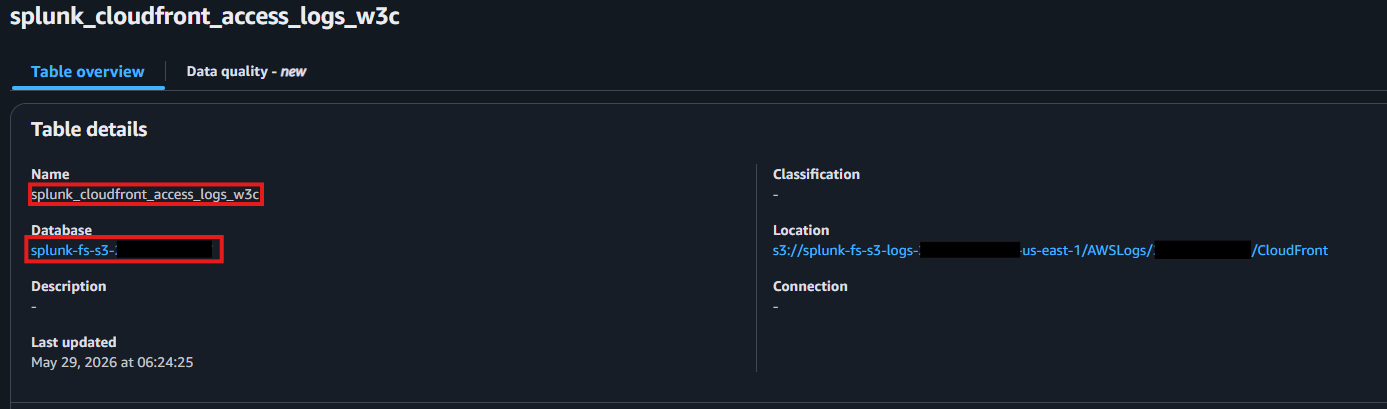
select the splunk_cloudfront_access_logs_w3c table as you did before. - From the Glue table, table overview. You can see most of our required settings. See them highlighted in the screenshot below
- On the Splunk screen enter the
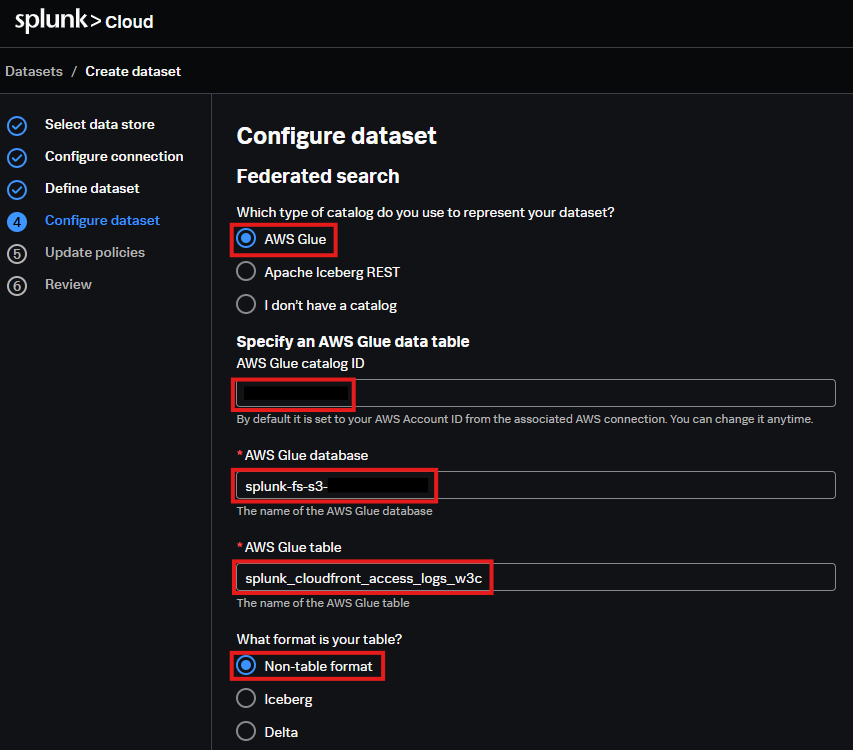
AWS account id as the AWS Glue catalog ID.This can be obtained top right hand side of AWS console.
You can confirm this if you wanted to. On your AWS Glue console. Select Catalogs from the left hand menu. You will see here your catalog name is your AWS account id.
Enter in the AWS Glue Database name from your Table overvieweg splunk-fs-s3-{accound-id}Enter in your AWS Glue table name from your Table overview.eg splunk_cloudfront_access_logs_w3cSelect Non-table formatas the format for our table.
See example so far:
- In the Time settings details enter the text of
time for Time field,%H:%M:%S for Time formatand_time as Unit time fieldas shown in the example below:
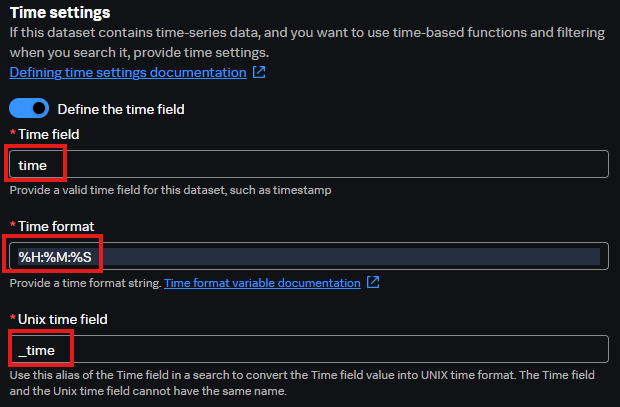
Time settings in Federated Search can break or alter the outcome of your search result which could lead to changes in cost as well. CloudFront Access Logs uses a 24 hour Hour Minute Second format for time. This is why we have chosen %H:%M:%S in the time format settings for the federated >index. If you are attending this workshop as part of a joint Splunk / AWS immersion day we will explain in further details around the time settings and how they maybe important to your environment. More information can be found here.
- Leave timezone settings as is and
select Next to continue. - We are not using KMS keys for this lab so
select Nofor KMS keys on the next screen. You should now see a button appear for Generating Policies. Click Generate policiesbutton. Please take the time to study these before clicking next.
If you were doing this in your own environment you would need to create policies using the ones generated. These are then attached to the role we modified earlier that we assume permissions from. Thus giving Splunk the permissions needed to run the actions we need in your account.
This lab has these policies already defined so we wont need to do this. If you are running this in an instructor led course your instructor will explain these policies too you.
Click Next when ready- Read the note about AWS policies and
click Confirmwhen ready. - Review the settings and
Click create Dataset. See example below.
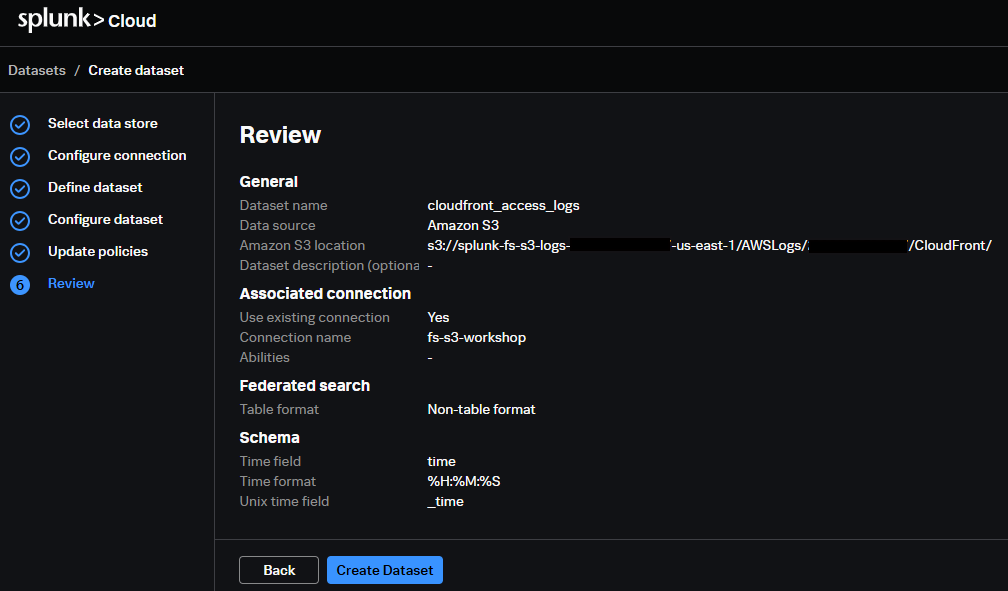
Dataset should now be created. It is now time to search it and see if it is working correctly.
Running our first Federated Search for Amazon S3
Now it's time to test if all of our hard work has paid off. Let's try our first search against data in CloudFront Access Logs.
- From the Splunk console.
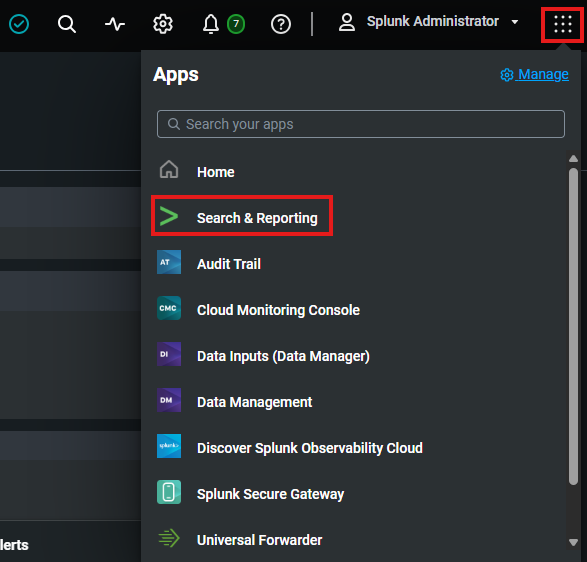
Click the 9 set of square dots on the top right hand side, followed by the Search & Reporting link. See example below
- If prompted,
Click Don't show me this againfor the victoria experience box.
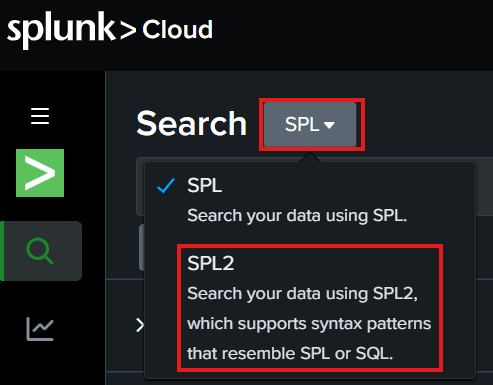
Federated search uses SPL2 as its primary query language. Please note that all searches run in this lab should be run using SPL2 search type. We will show you how to select this if not already.
- From the search bar,
select the SPL drop down and choose the SPL2 optionas shown in picture below:
- From the Splunk search window.
Adjust the Time rangeto beAll timeandPaste the search below into your search window and run the search.
The first time you run this it may give you a warning saying Resources are being provisioned for your search, Provisioning can take a few minutes. If you see this please wait about 3-5 minutes and try your search again.
index=cloudfront_access_logs | head 100There is also a few different ways in which you can search with federated searching using SPL2. We will look at that a bit later. Right now we are just trying to test the data can be successfully searched.
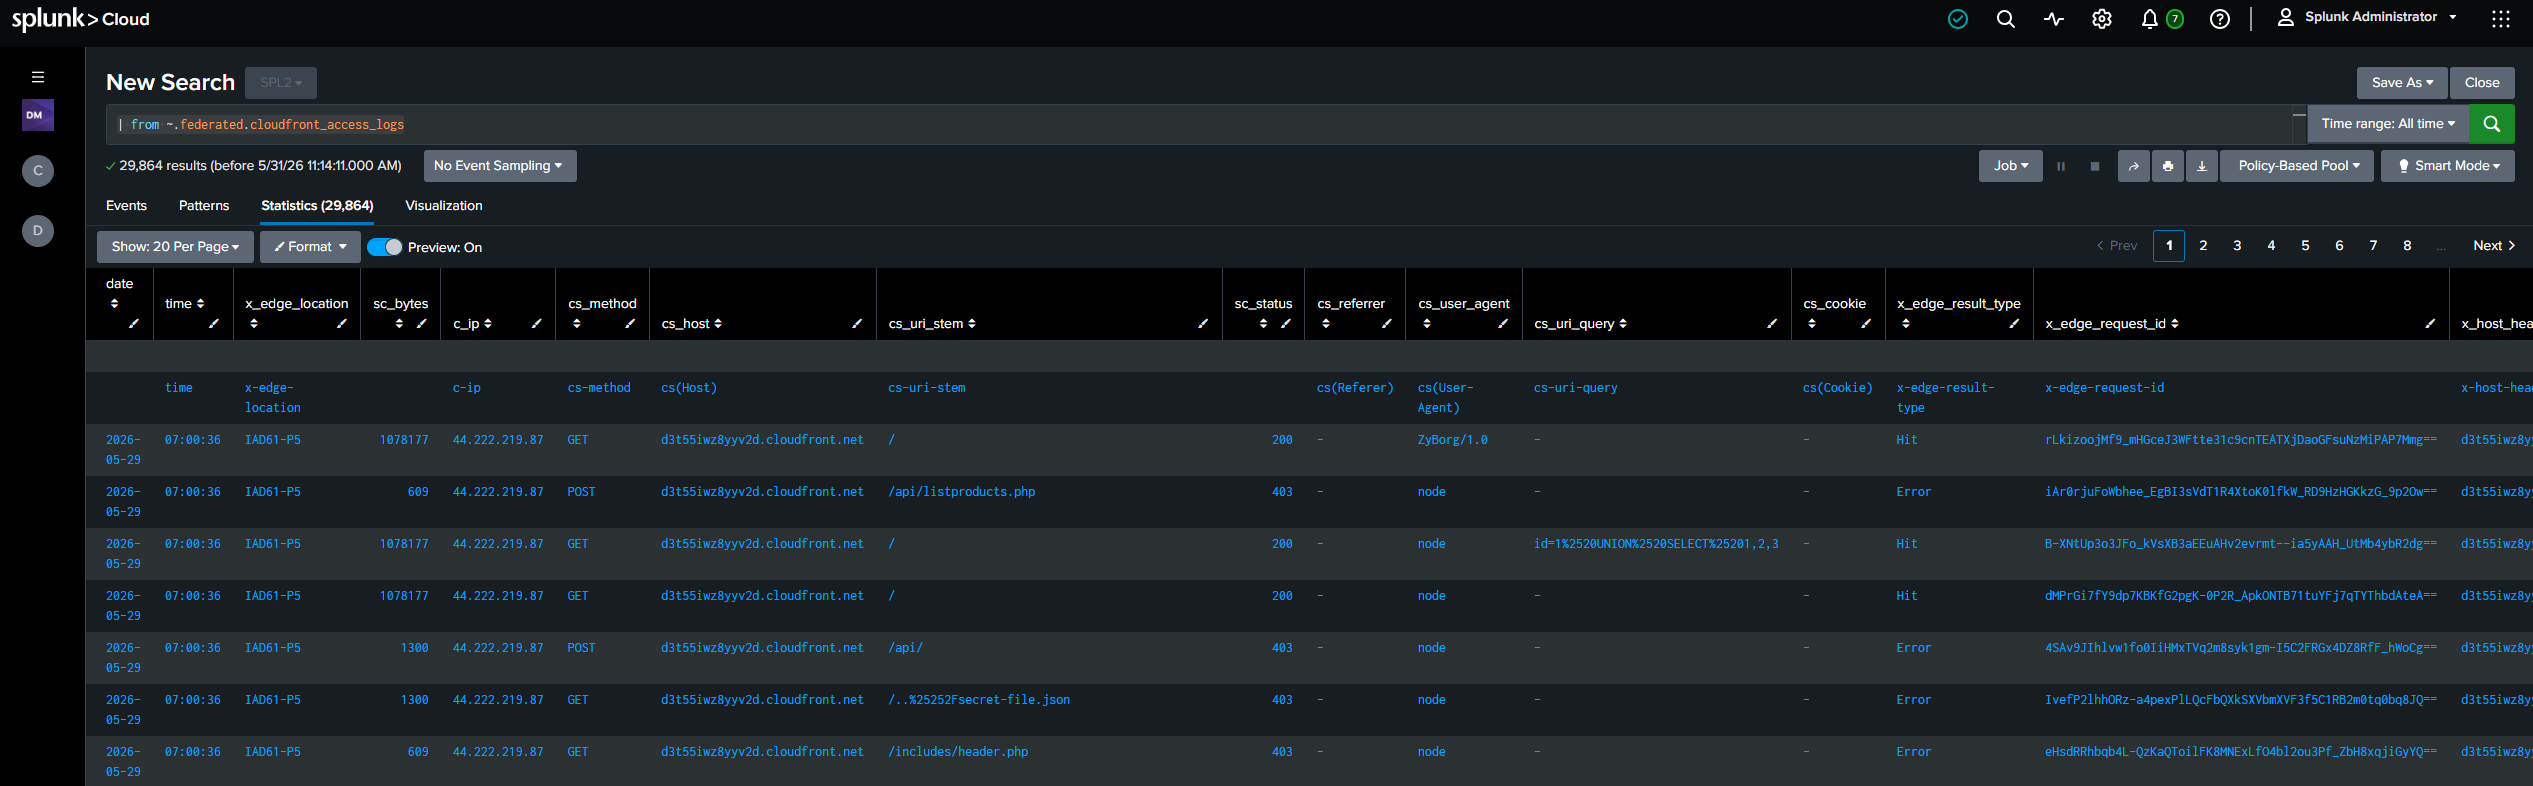
Congratulations! You have now successfully set up your first Splunk Federated Search for Amazon S3 again CloudFront Access Logs. With that you have now completed the lesson! Well done!