
In order to understand the benefit of VPC flow logs we need to configure some. VPC flow logs can be configured against many services. Even against an entire VPC, this provides an ability to be broad or granular. In this first part of lesson two we will set up VPC flow logs against a pre-deployed VPC in our workshop. We will then deploy an EC2 inside that VPC which when accessed will generate logs.
Setup VPC Flow Logs
- From your AWS console search for and
select VPC

- This is the VPC dashboard. From here there are many things to see and do but for this lesson we want to explore the VPC. From the
left-hand menu, select Your VPCs.
There are many ways to configure VPC flow logs from the AWS Console. Below is the simplest for our workshop
- From the VPCs page you will see the VPC created as part of the workshop. If it's not selected,
select it now by ticking the tick box for it.See example below

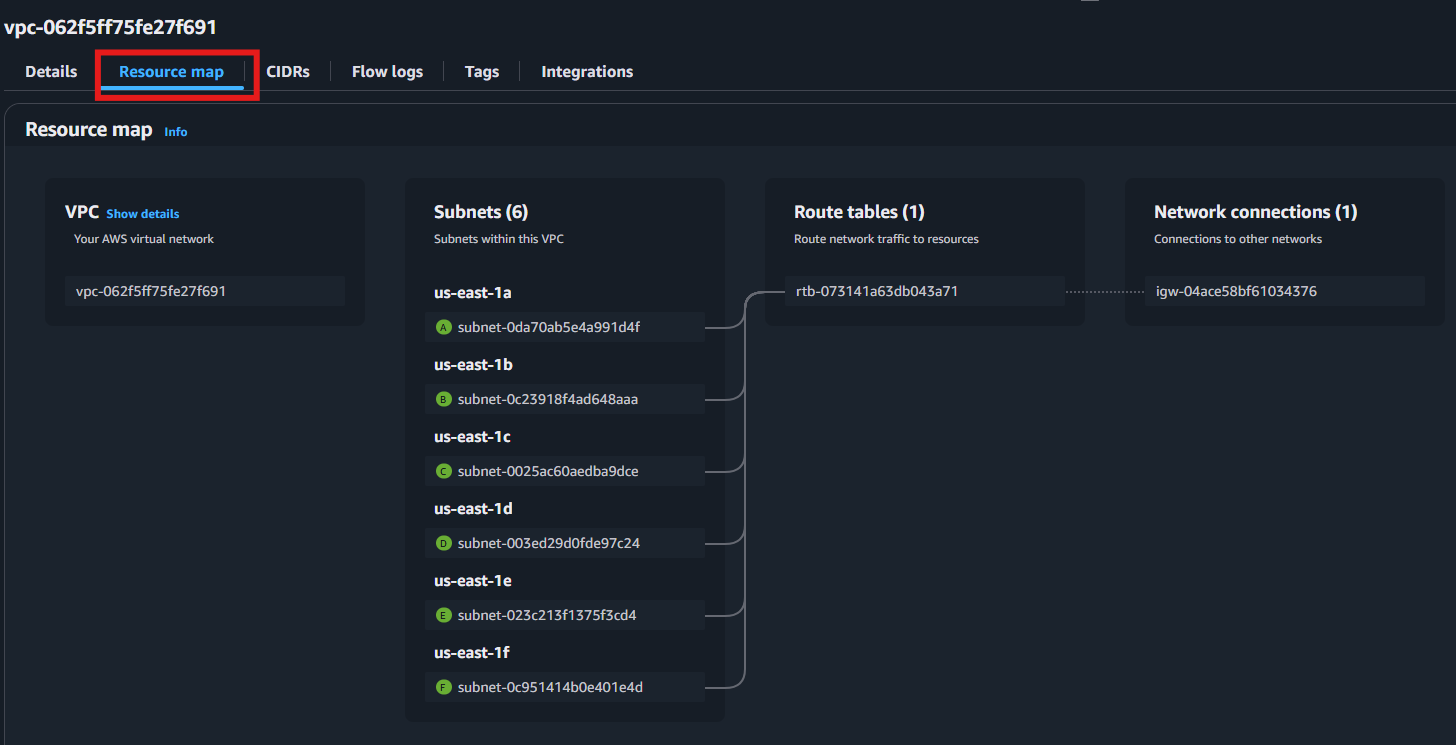
- This will open up (if not open already) a panel down below showing you key information about your VPC. Let's explore the resource map by
clicking the Resource Map tab.
From here you will see the network layout of the VPC. This is a handy tool to check how things are configured for your VPC in a single visual representation. See example below
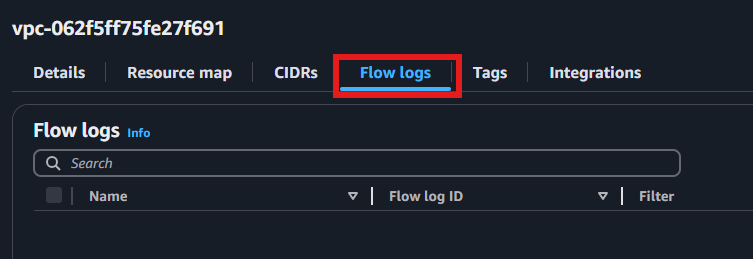
- Now it's time to create a VPC Flow log.
Select the Flow logs tab.You will note currently there are no flow logs. See example below:
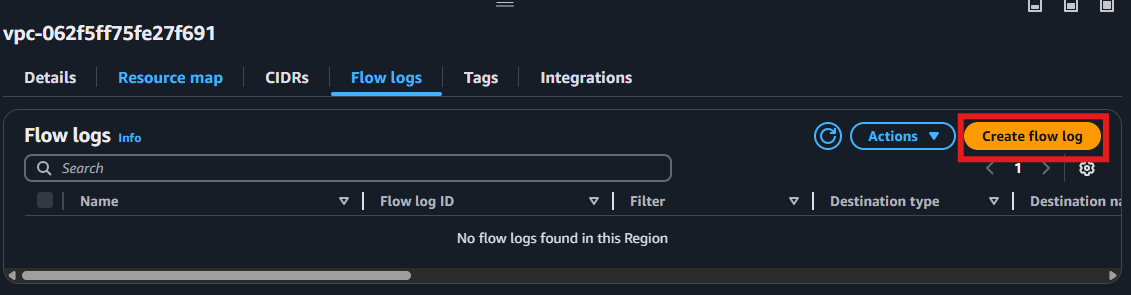
- On the right-hand side,
click the Create flow log button.
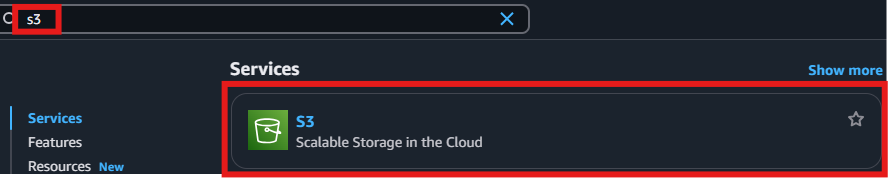
- Leaving this tab open we need to go and copy the S3 ARN as we will need it to create a flow log. To do this
search for and open in a new tab S3.
Select the logging s3 bucketfor the workshop (same one used in lesson one), should be starting with splunk-fs-s3-logs-{account-id}-{region}Select the properties tabandcopy the Amazon Resource Name (ARN) for the bucket. See example below. Note: you can use the two blue boxes to copy it.

- Now we have copied S3 arn we will use that in the flow log setup page.
Go back to the other tab for your flow logs now. - From the Create flow log page we will fill in a few details as outlined below. See example at end.
- Name: full-vpc-flow-log
- Filter: leave as default (all)
- Maximum aggregation interval: Set to 1 minute
- Destination: Set to Send to an Amazon S3 bucket
- S3 bucket ARN: Paste the S3 bucket ARN you copied earlier
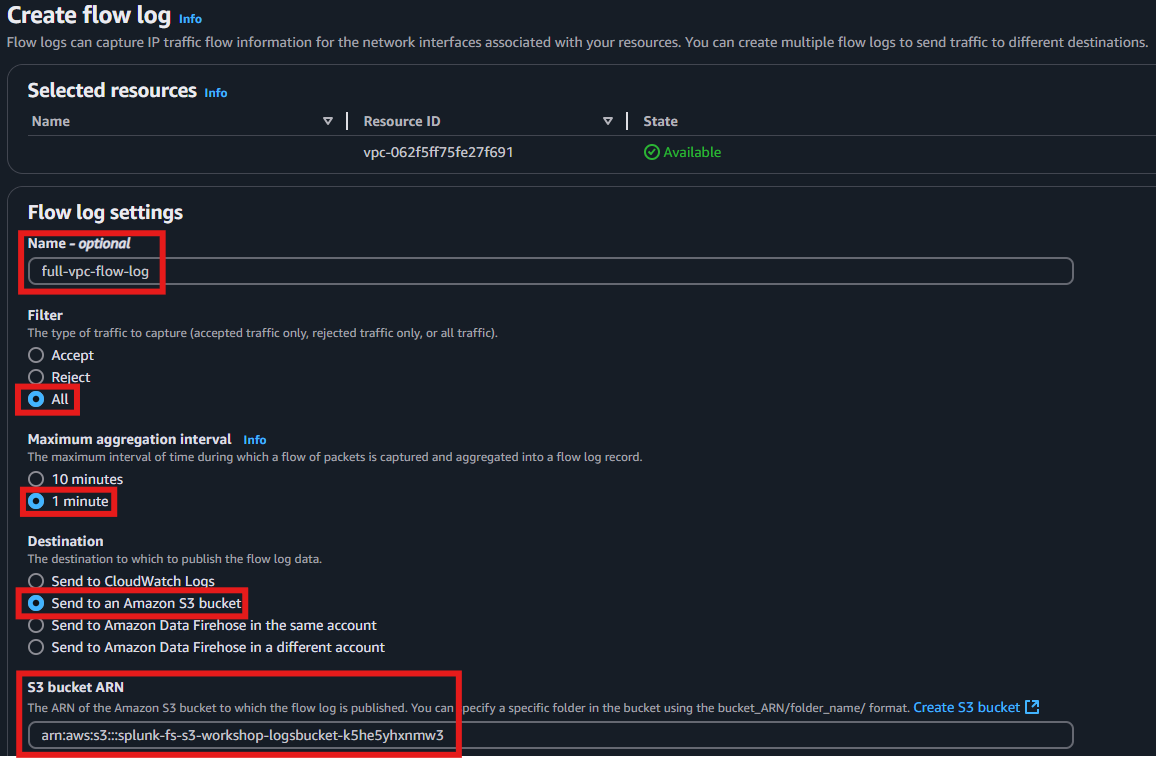
- Scroll down to where it says
Log file formatand selectparquet Tick the box for Hive-compatible S3 prefix- Select
Every 1 hour (60 minutes).under partition logs by time. See example below for options selected:
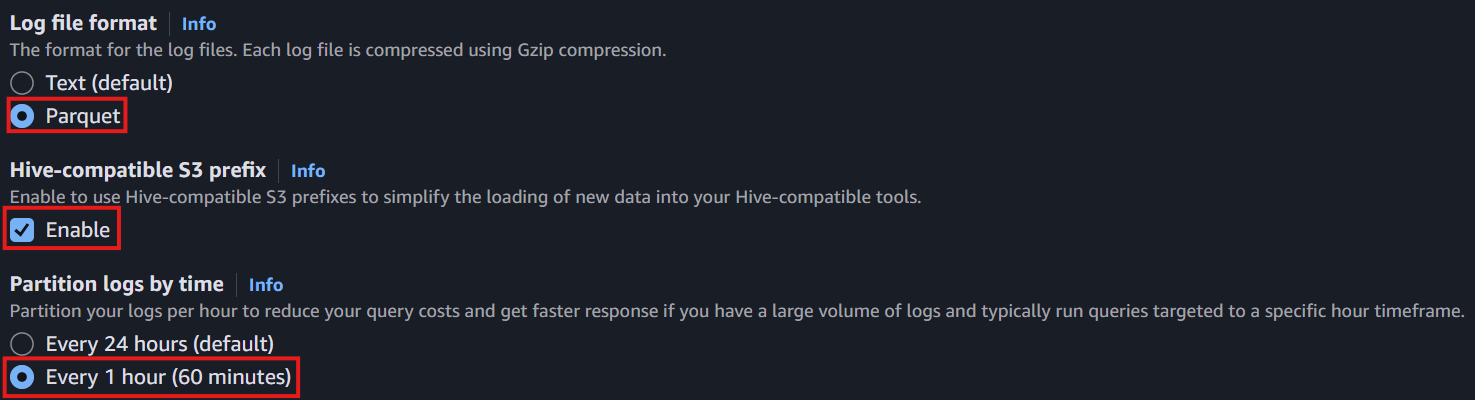
- Leave all remaining settings and
click Create flow log - You should see a green rectangle saying
Successfully created flow log for vpc-xxx.
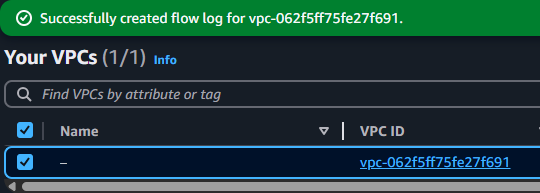
Re-Select Your VPC's (left hand menu) then the Flow logs tab.You should now see a new flow log!Click the link for the Destination Name(your s3 bucket). This should open up your S3 bucket in a new tab.Navigate the S3 folders for AWSLogs.You should now (or very soon) notice a new folder in the Apache Hive format. eg aws-account-id={account-id}. If you select into the folder you will note we have NO VPC Flow logs so far.
So let's create an EC2 instance now and make sure it's in that VPC, so we can generate some VPC Flow logs!
Creating an EC2 Instance
If you are part of an instructor led lab we will cover off some more details about Apache Hive format which uses key=value pair folder structure. This method is generally the easiest way to optimise your searches. More on that later. AWS has some good documentation on this here.
- From your AWS console,
search for and select ec2.

- You will note there are no instances currently in your environment.
Click the Launch instance buttonin the middle left-hand side of the screen.
This next section is broken down into multiple steps for creating an ec2. Pay close attention to the steps and screenshots.
- EC2 basic details. Fill in the below. See screenshot with example.
- Name: Name your ec2. e.g. mr-ec2
- Application and OS Images: Leave as Amazon Linux.
- Instance type: Leave as t2.micro.
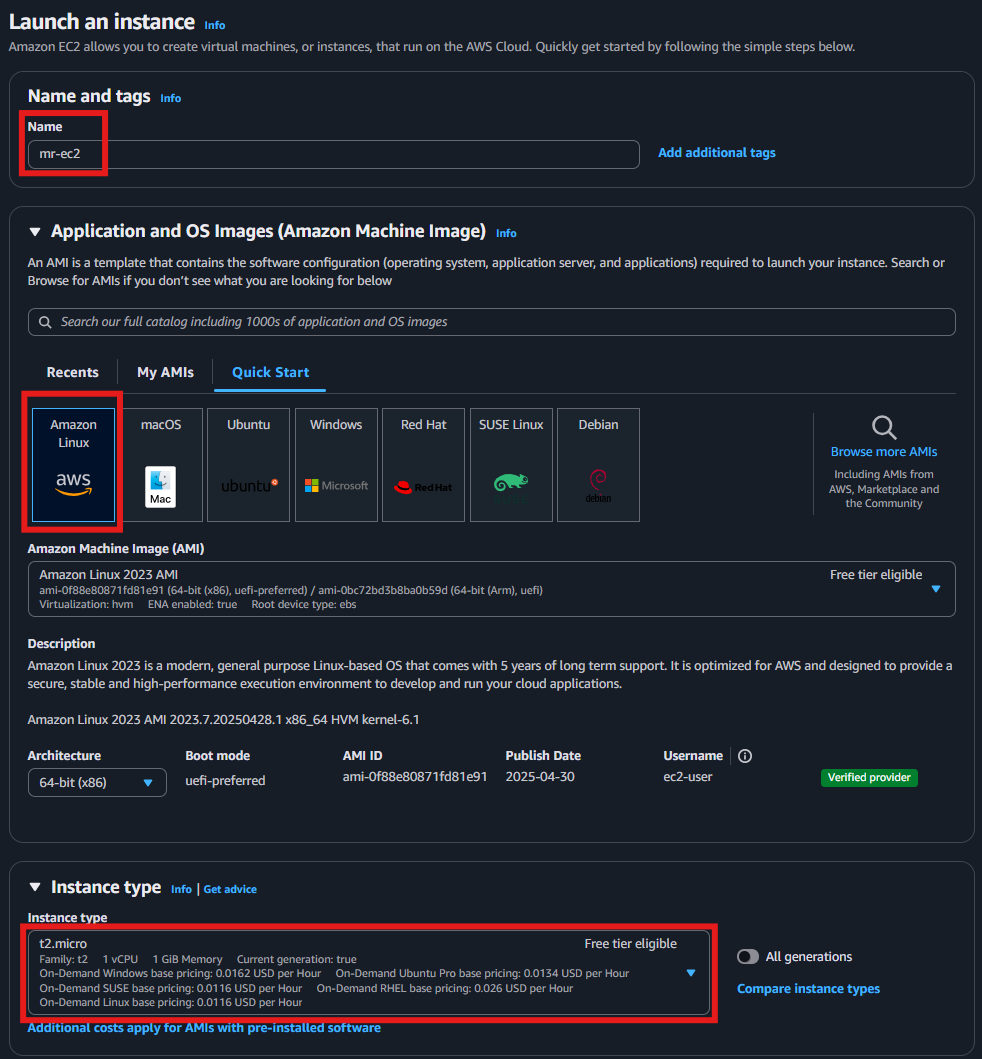
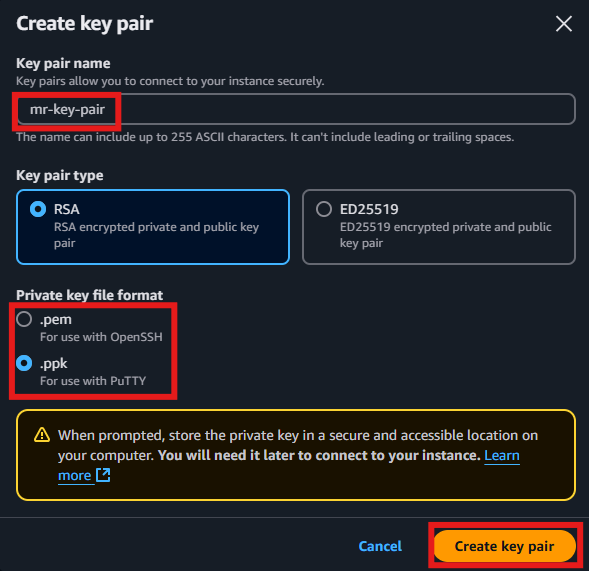
- Time to create an EC2 key pair and select it. From the Key pair section. Do the following:
- Next to the Key pair name-drop down,
Click Create new key pair - Key Pair Name: Give your keypair a name eg mr-key-pair
- Private Key file Format: Select format you prefer eg Putty or OpenSSH.
- Click Create key pair when ready.
We most likely won't use the keypair as VPC Flow logs will generate without it but, select the correct format for you in case we want to login!
Key pair cont... Make sure your new keypair is now selected in the drop-down.

When you create the key pair you should have seen this download to your computer. Make sure you pay attention to where it went, you may need it later!
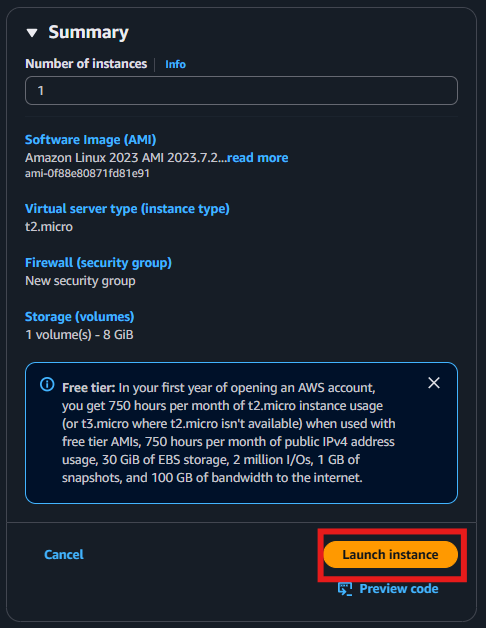
- You can leave all remaining defaults and
click the Launch Instancebutton to the right hand side.
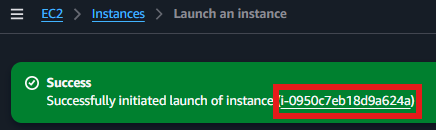
- If all things went well you should see a green box saying, Success.
Verifying VPC Flow Logs
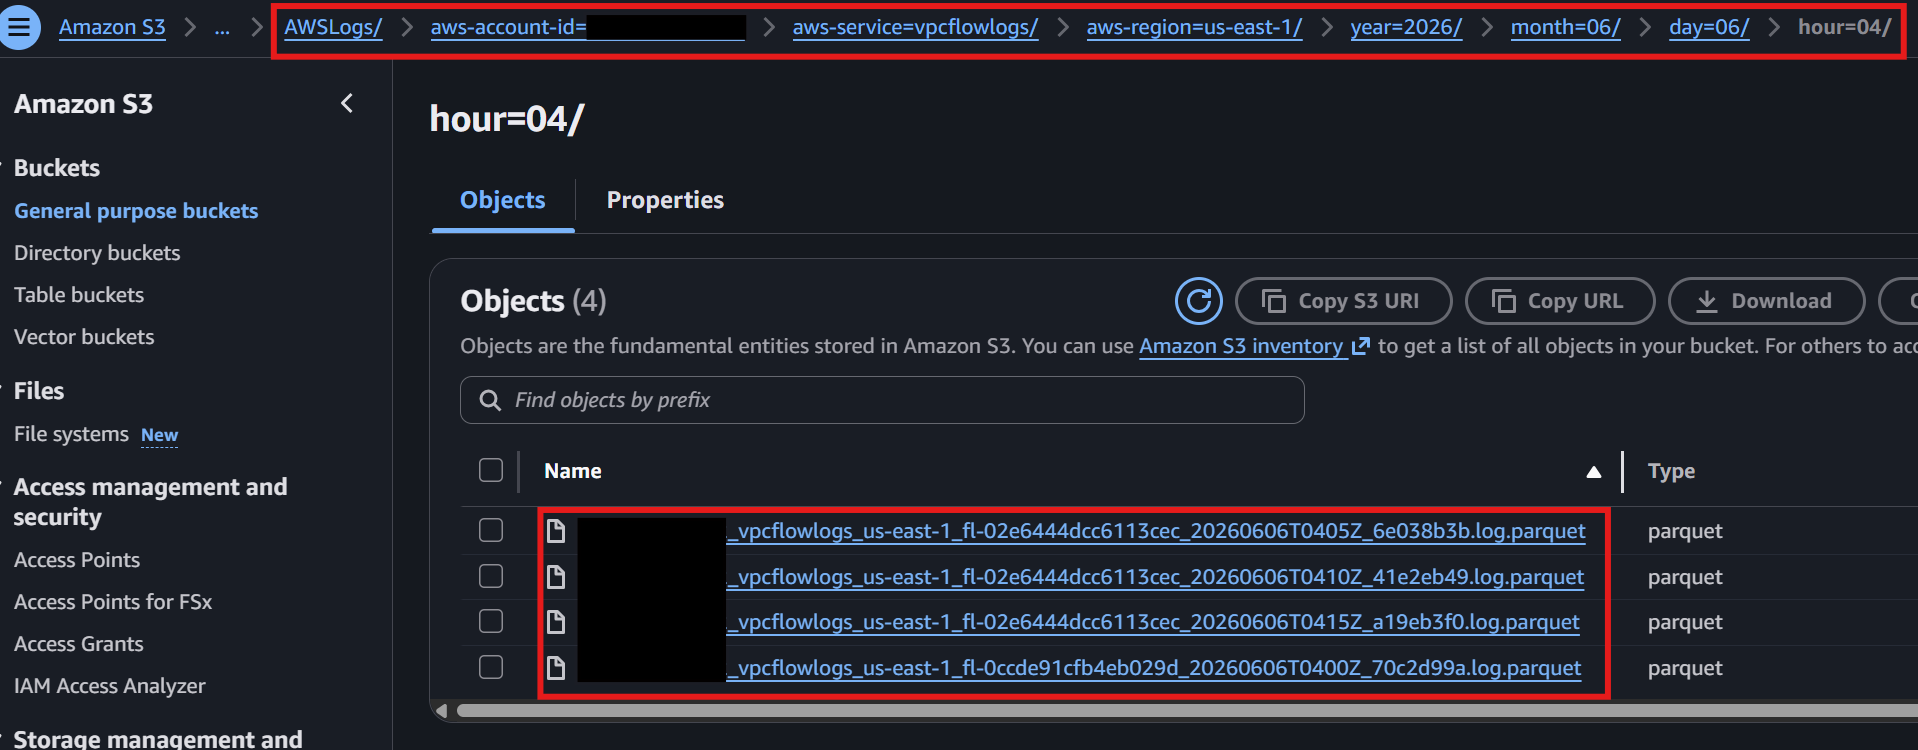
It can take up to 10 minutes for the first set of VPC flow logs to arrive in an S3 bucket. Time to stretch your legs! Or if your like me, go back to the S3 tab you had opened before (if not from the steps above go back to our S3 folder where the VPC flow logs should be). Press the refresh button till you see some logs. It should look like the image below when done.
- Now we see the logs, let's look at the format of a VPC Flow Log.
Select the first flow log from the list using the tick box and click the download button.See example below.
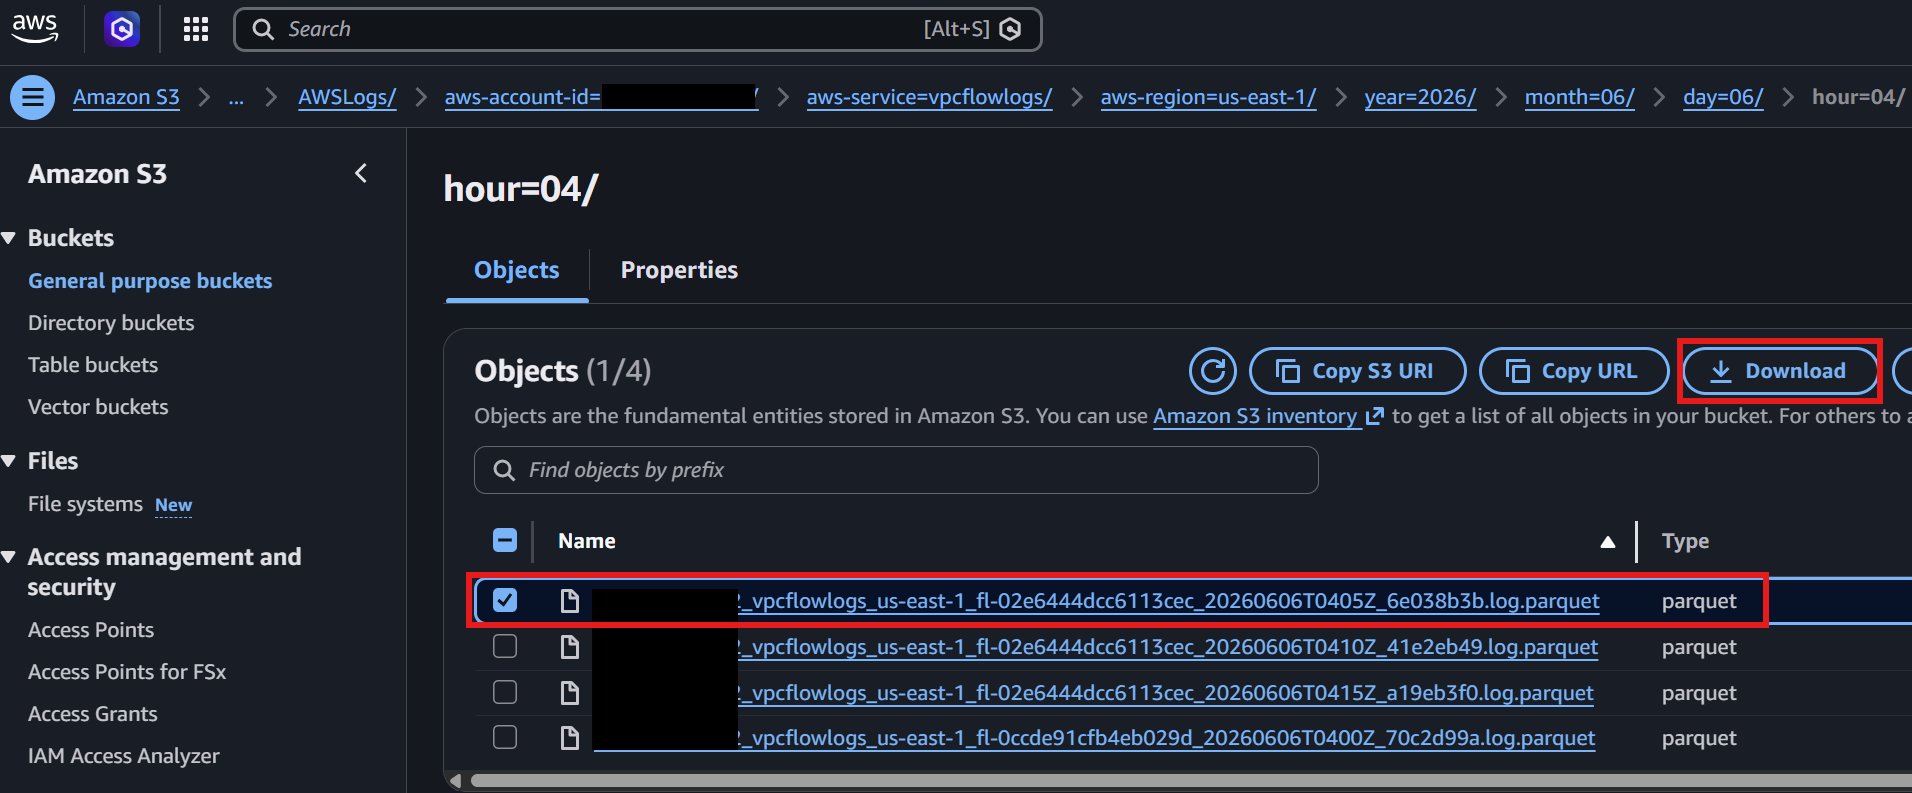
As we have chosen the parquet format for this lab you will not be able to view this file as you would a normal text based file. Parquet is a compress binary columnar format. This means we will have to open it up in something that can help us read it. There are many ways to do this but we have chosen as easy one for you.
- Go to the following website here: parquetreader.com and drag your parquet downloaded file into upload section to open it up. See example below
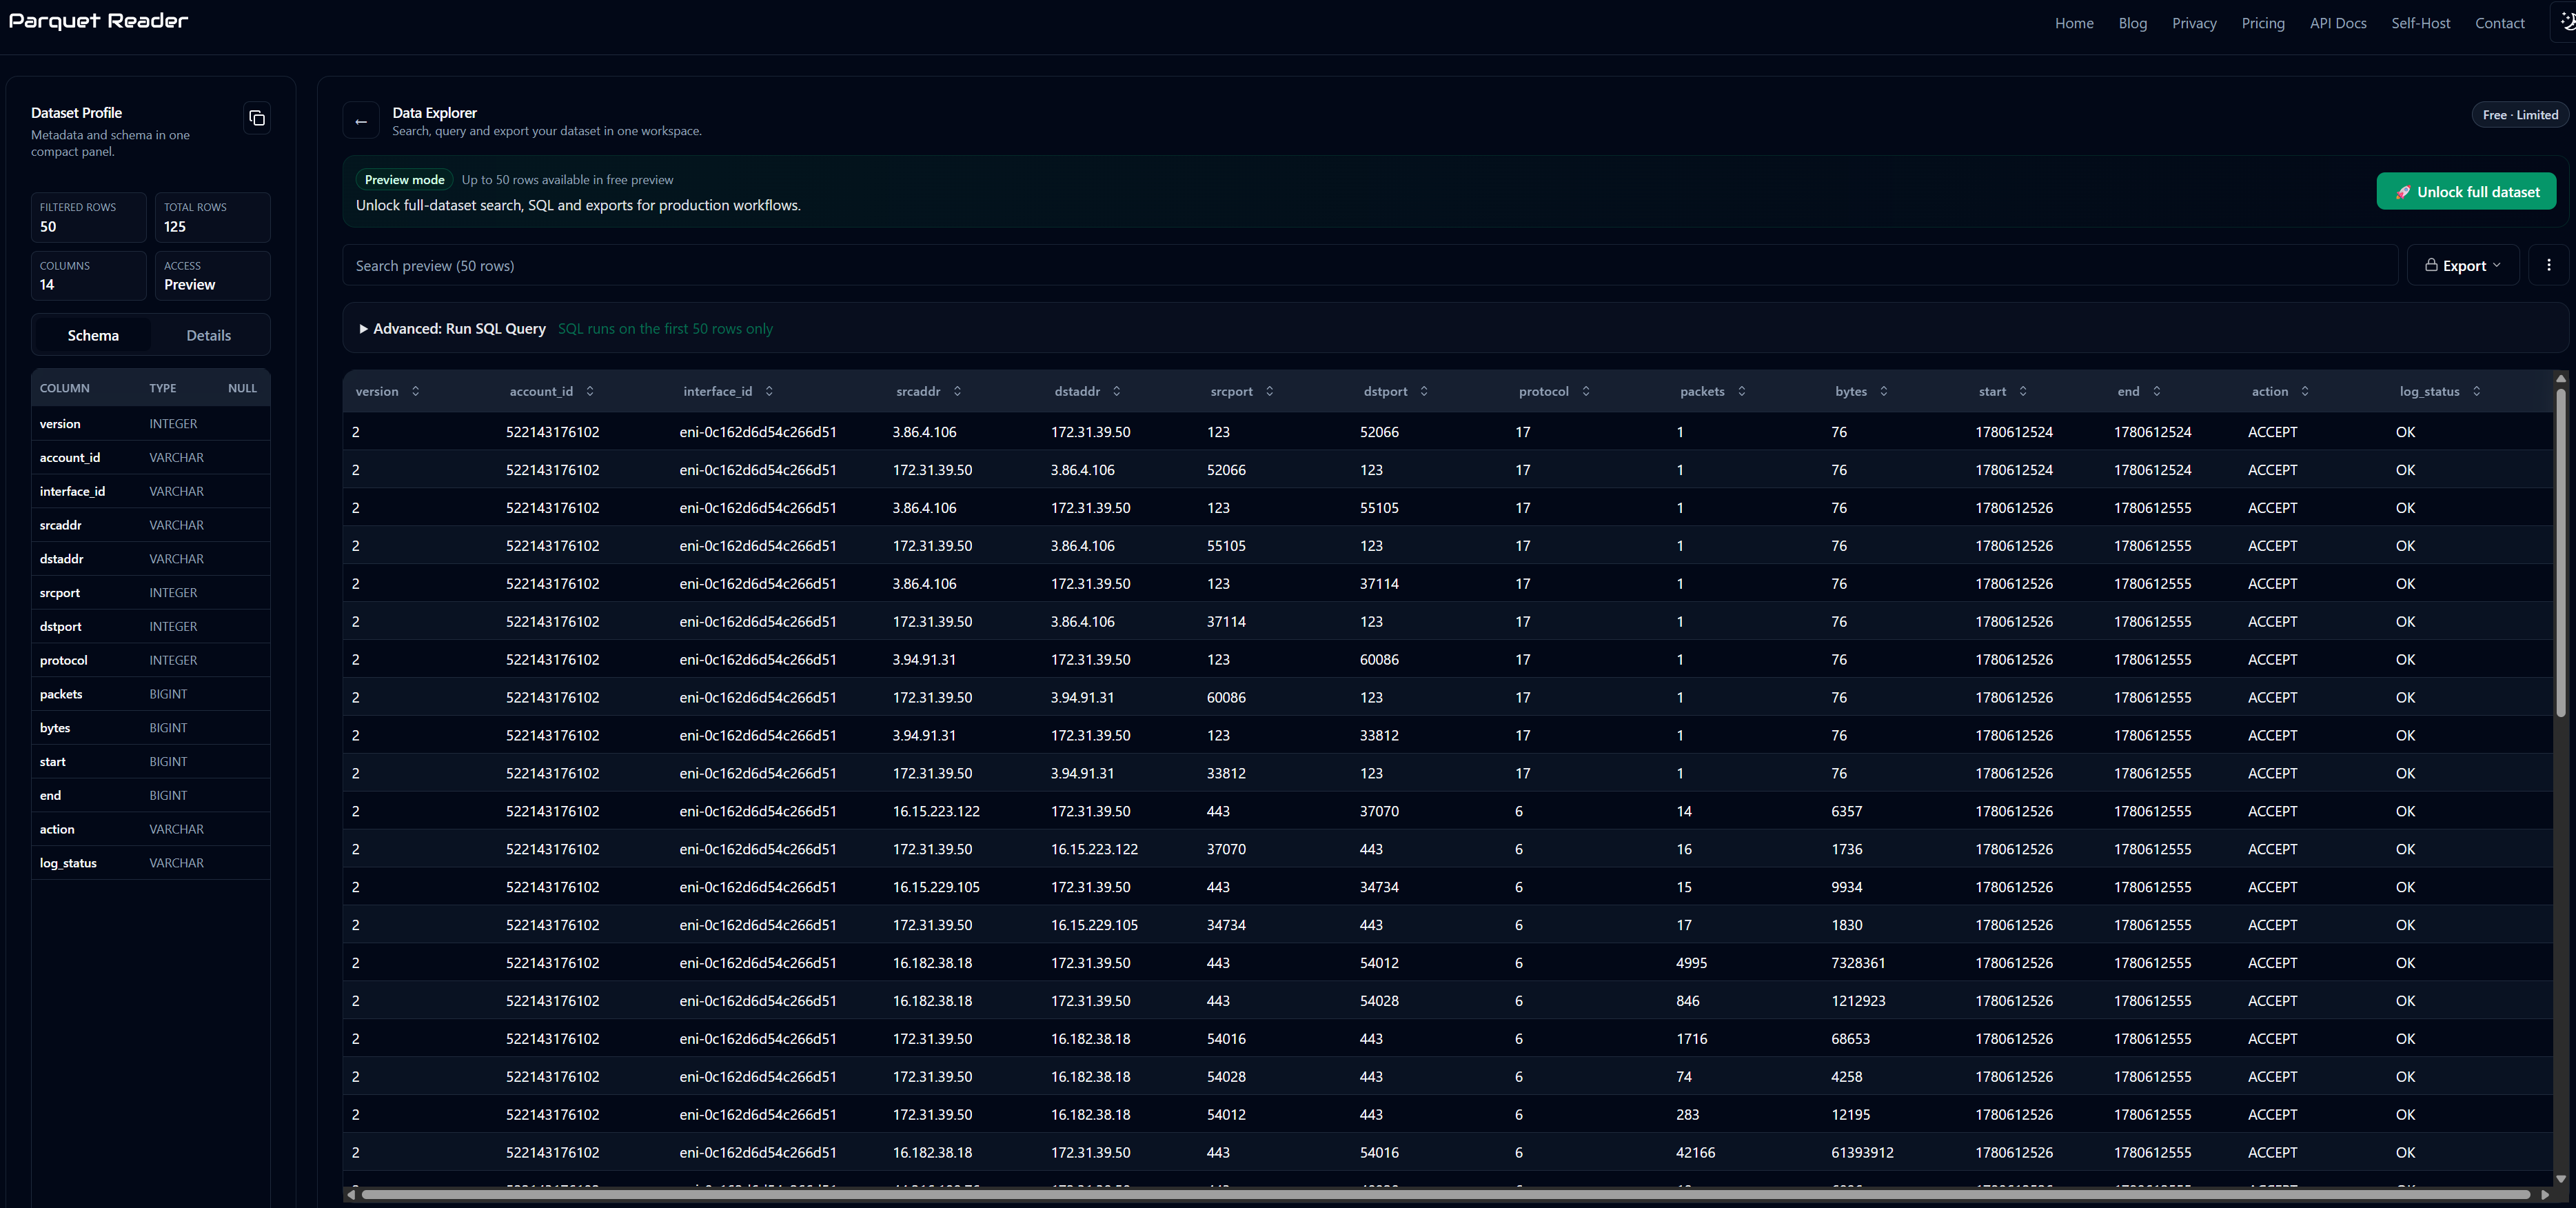
Have a look at the VPC Flow log format. It has headings explaining each column type with key items such as account ID, interface ID etc.
This wraps up the first section of Lesson Two. Keep that file VPC flow log file handy as we will look at it in a little more detail in the next section.
Congratulations! That ends the first section of lesson two; configuring and exploring VPC Flow Logs. You should now have deployed your first VPC Flow log and see it land in your S3 bucket. Let's now more onto section two; Amazon Athena and Data Definition Language (DDL).