
Section Two: Promoting Data with Machine Data Lake
Now we have routed some data to Splunk's Machine Data Lake we are helping to optimise the team at imnotbiased.com data to match performance vs price. In this next section we are going to show you how you can easily promote a subset of data to DDAS for queries which need the extra performance and analytics capabilities.
Promoting Data in Machine Data Lake
Last time we showed you how to connect to the Splunk catalog service via the menu option. This time we will show you via the shortcut on the main Splunk Cloud screen.
- From our Splunk Cloud console.
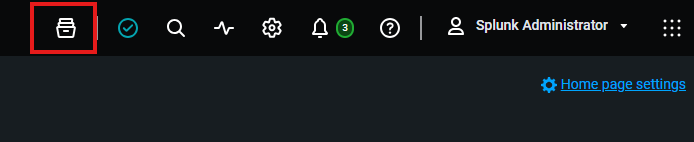
Click the catalog iconnear the top-left hand side. See example below
- Like before,
select our linux_secure_mdl catalog.See example below:
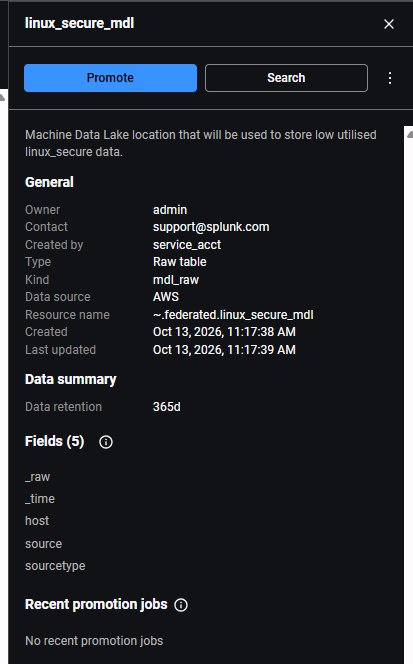
From here you will see our Promote button. This is used to promote Splunk catalog data into Splunk DDAS or an Analytics table which is part of machine data lake. You instructor will explain more around the Analytics table in your course.
Click the blue promote button.
From here a promote wizard should open, see example below:
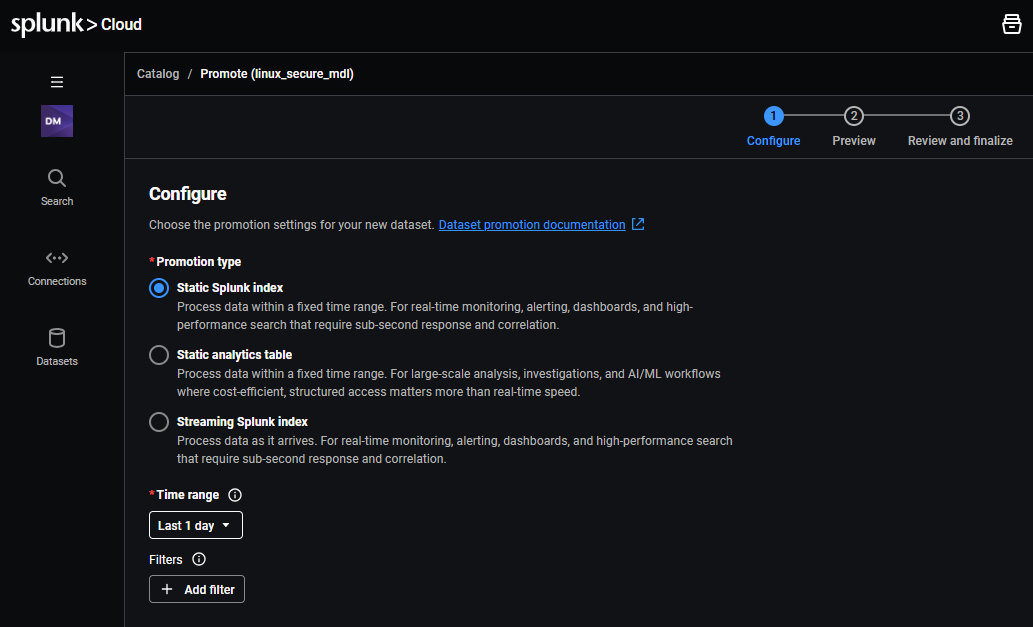
From here we have three main options:
- Static Splunk index: This is used to promote data into DDAS (tsidx) format.
- Static analytics table: This is used to promote ata into the Machine Data Lake Analytics Table
- Streaming Splunk index: This is used to send a stream of data from MDL into Splunk DDAS as it arrives in MDL.
More information on these can be found here
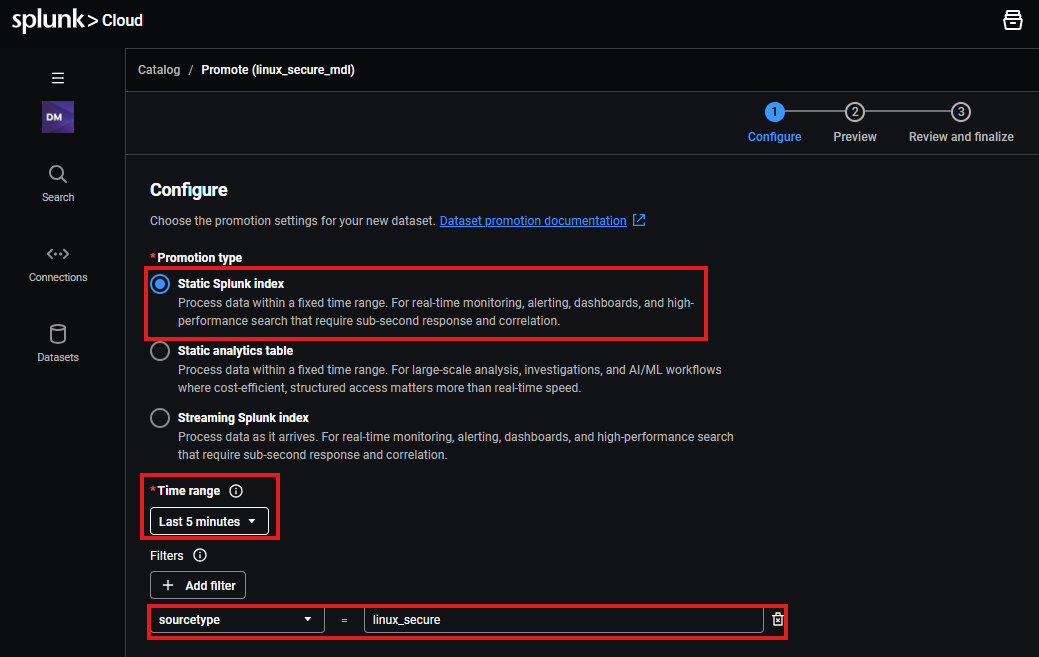
For this use case we want to do a one-shot static Splunk index promotion.
Leave Static Splunk index radio selected.
In the Time range section for a bit of fun we will only bring in the last 5 minutes of data.
Click the box which says Last 1 dayandadjust the time range picker to be 5 minutes ago.See example below:
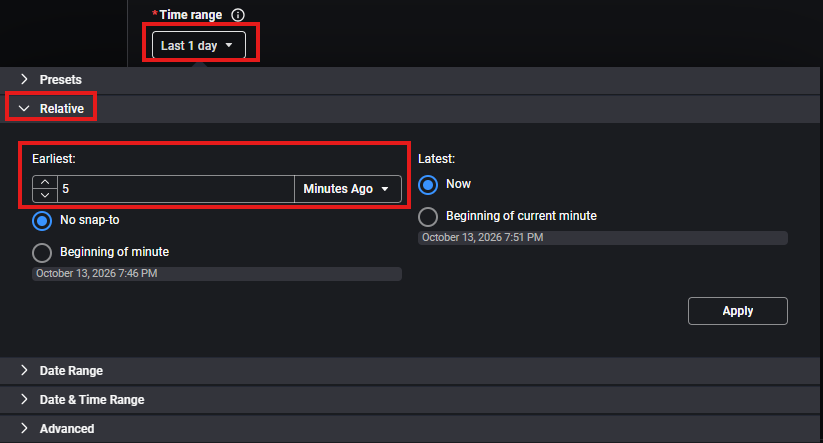
Click apply, to accept time.Click the + Add filterbutton.
From here like our pipelines we can filter MDL data based on key fields. Eg source, sourcetype and host. This can be handy when we only want to bring in certain type of data from our MDL raw table.
Leave sourcetype selected and enter in the text below.
linux_secureSee example below for filled out configure page:
- When ready,
click Nextto continue.
The next page is the preview data page. Currently there should be no data in preview. See example below:
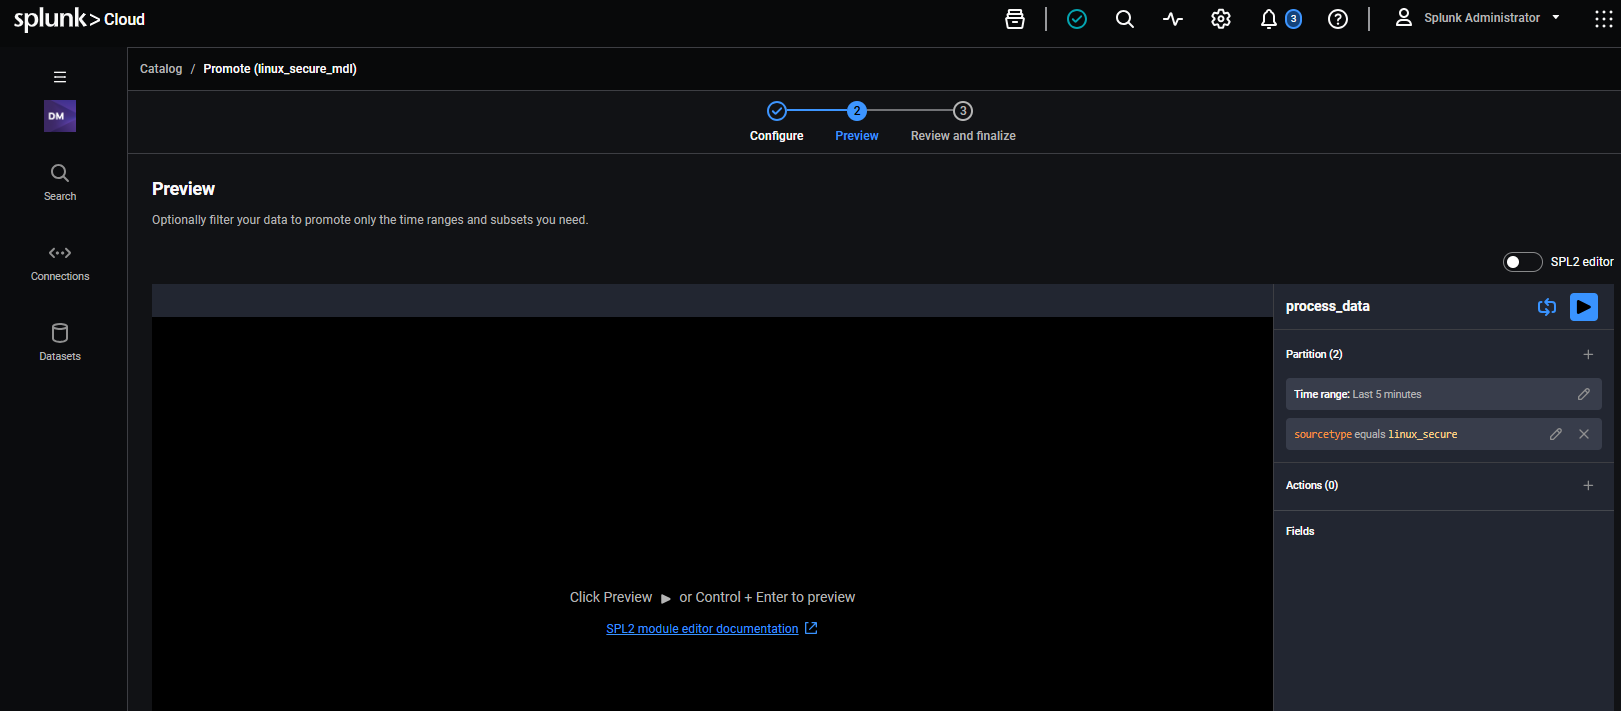
You will notice the timerange and sourcetype is set.
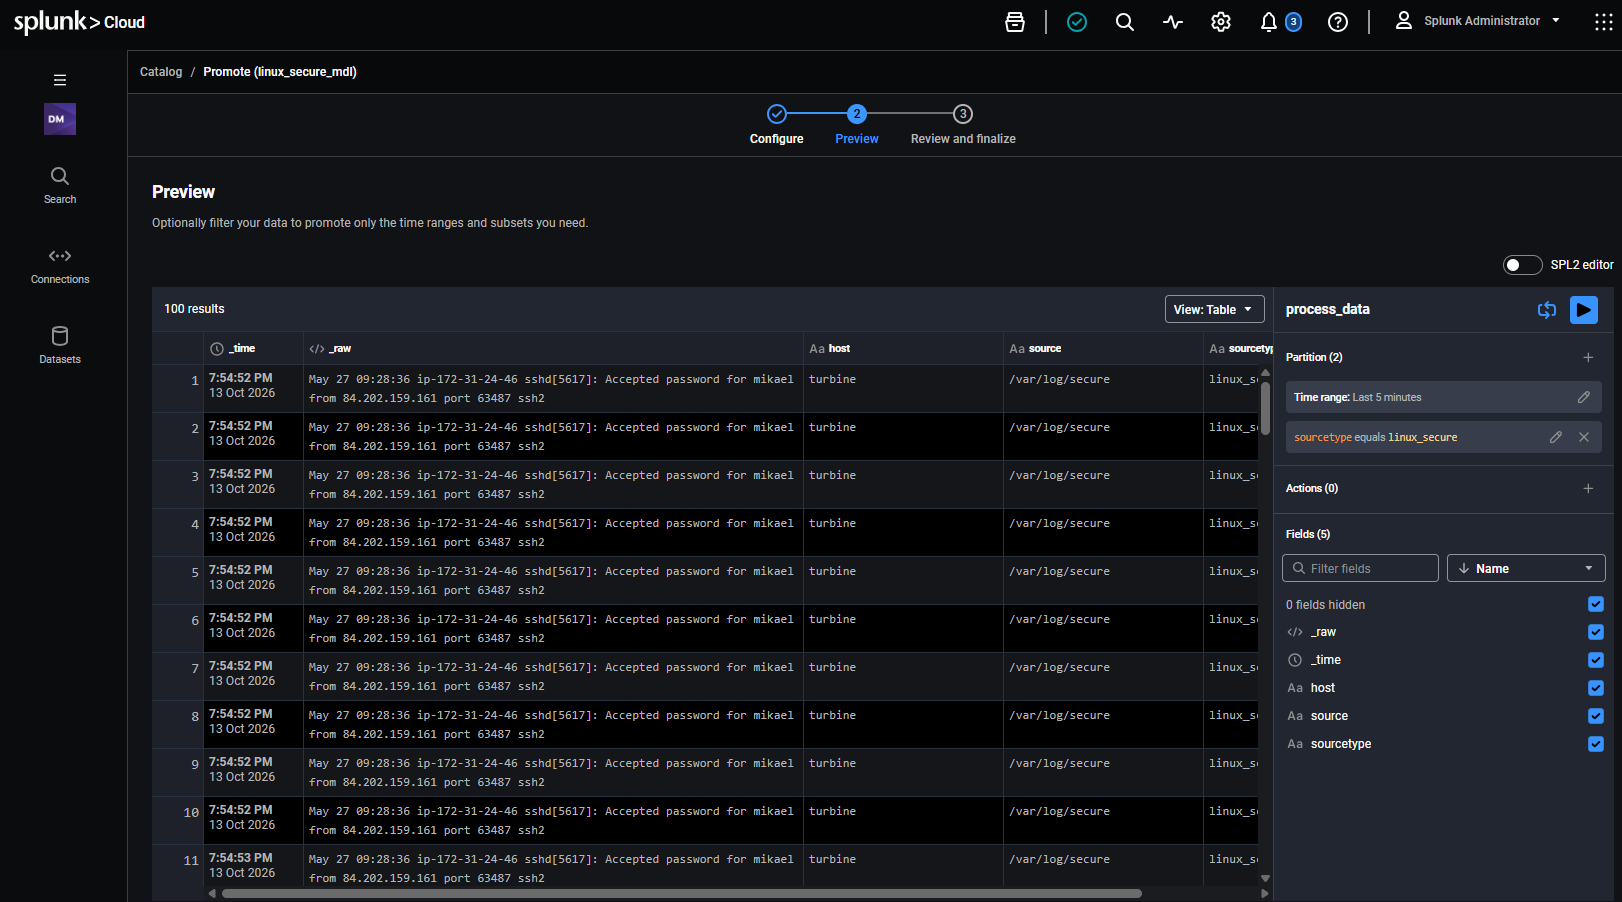
Click the blue play buttonto preview our data which we will promote. See example below:
- When ready,
click Next
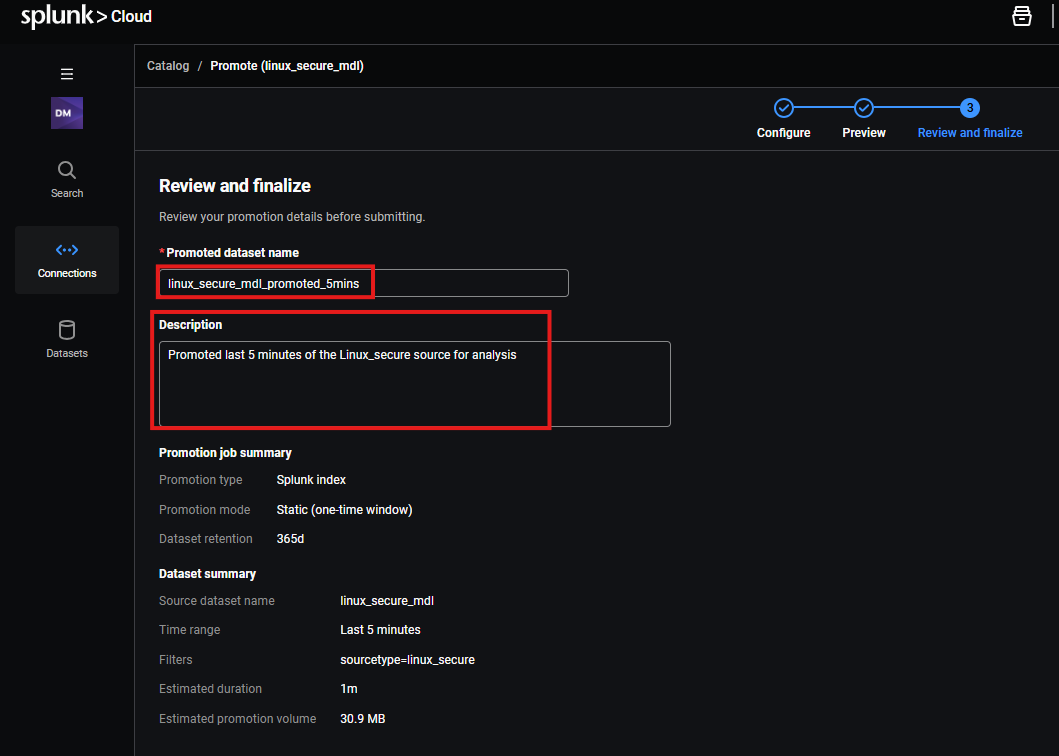
The final page asked us for a index (dataset name) and optional description. Replace the dataset name with the one below
linux_secure_mdl_promoted_5minsEnter the description belowinto the field.
Promoted last 5 minutes of the Linux_secure source for analysis See example below for filled in review page
- When ready,
click the blue Start promotion button.
After a few moments you should see a promotion kick off. it will start in pending status. See example below
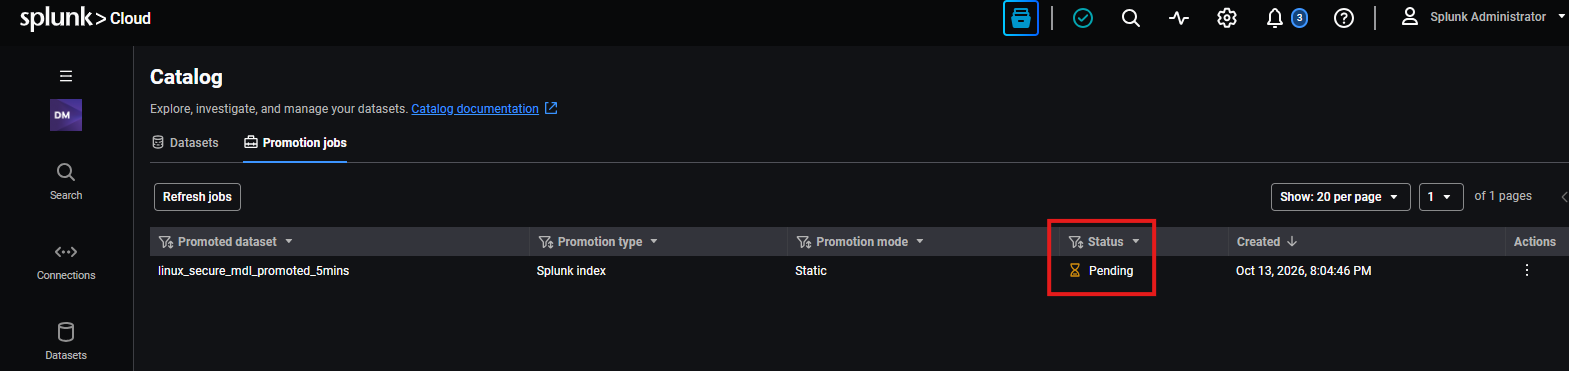
- After a minute or two click the Refresh jobs button.
You may see the next stage appear which is In progress. See example below
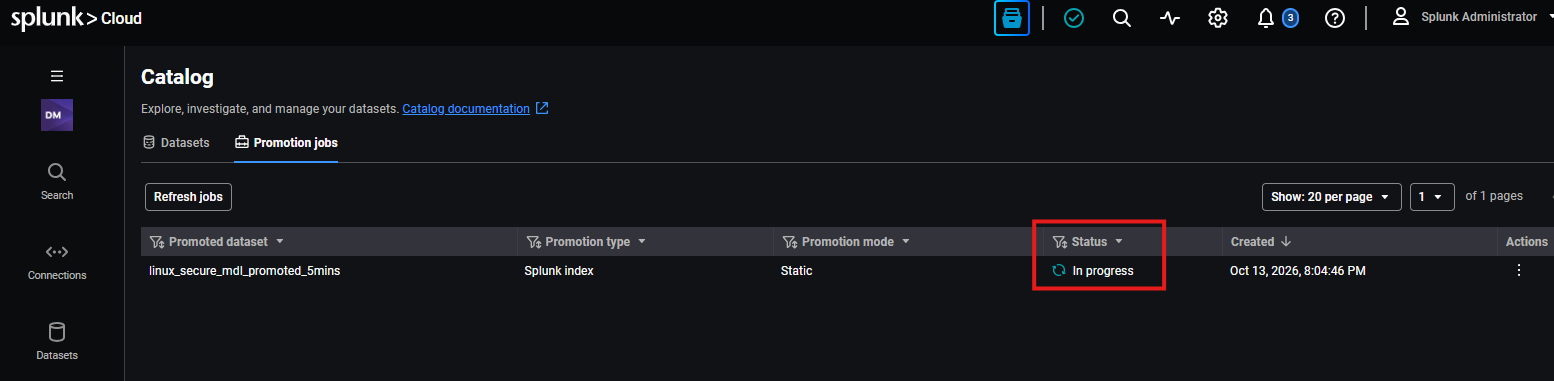
Continue to push the refresh job button after a few more minutes and our promotion should change to complete! See example below
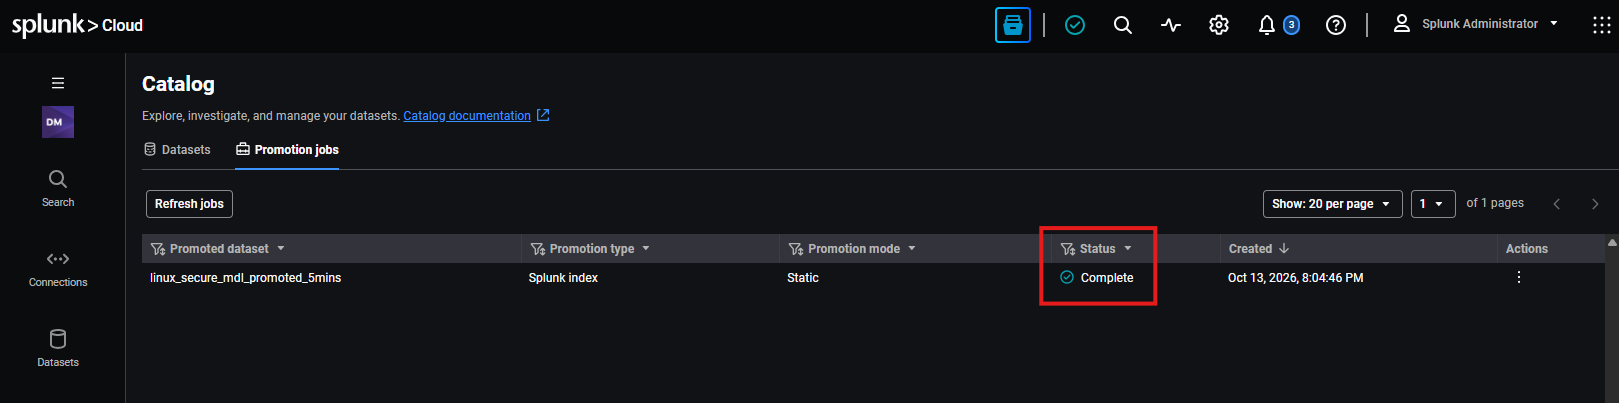
Now it is completed. Let's see if it worked!
Click the datasets tabnear the top left-hand side. It should be next to the Promotion job tab currently highlighted. See example below.
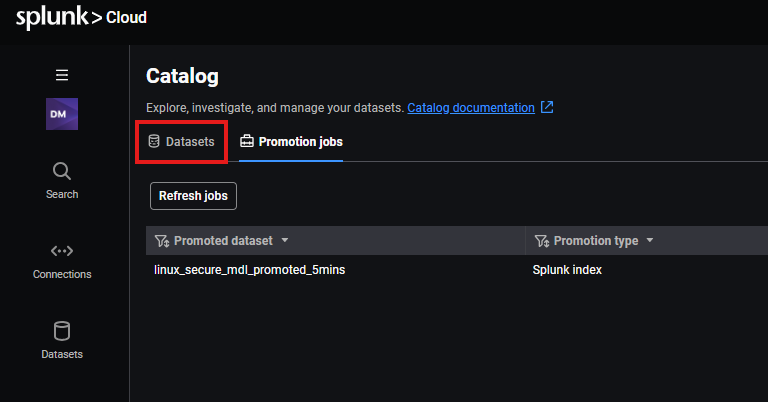
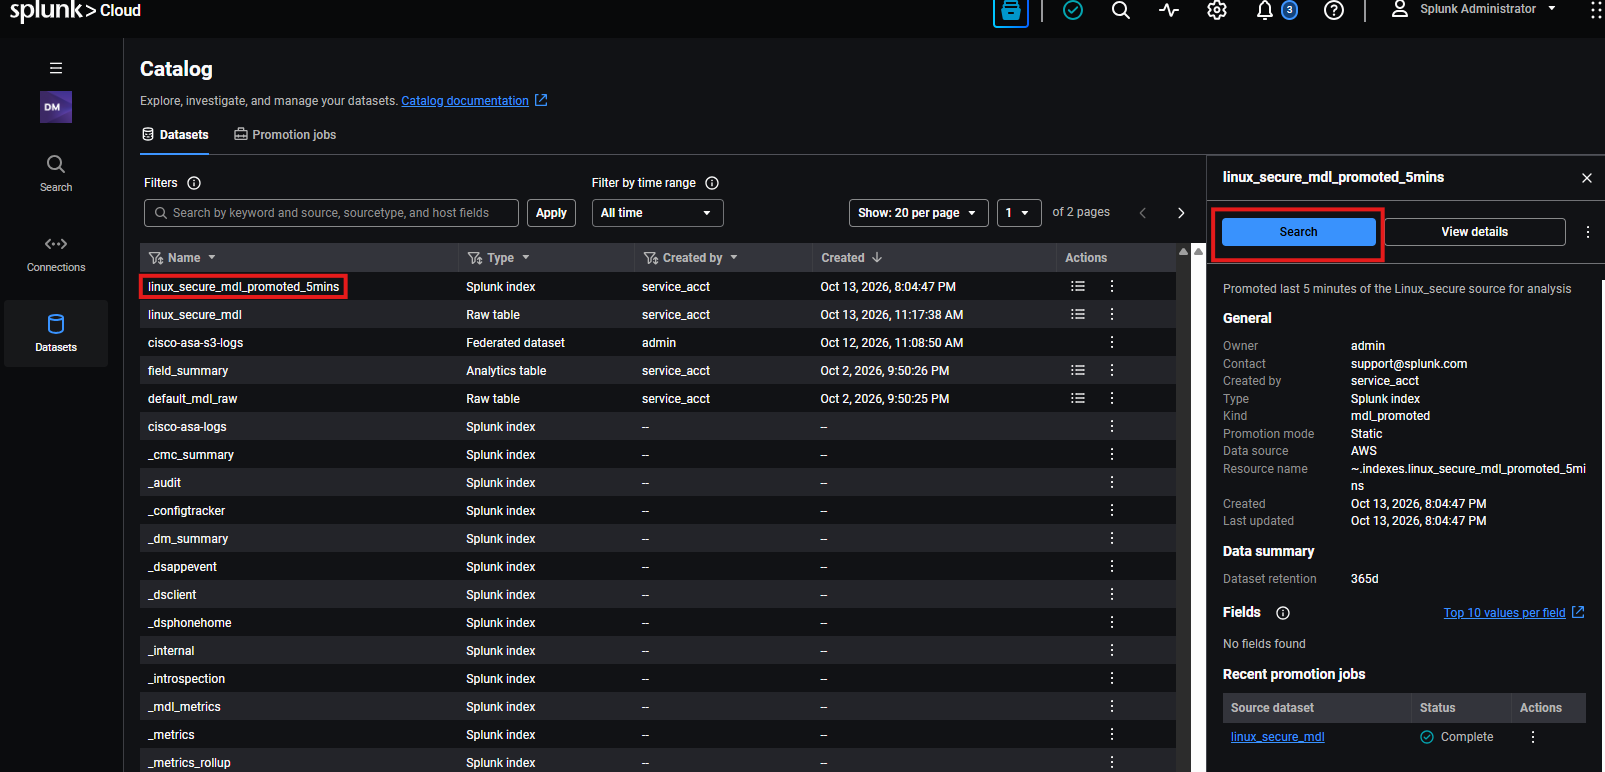
On the top of our list we should see our new index/dataset for the linux_secure_mdl_promotedd_5mins.
Click our new datasetto open up the details tab.Click the blue search buttonas shown below:
From here a new tab will open and automatically search our data. Before you even read this sentence the data will already have appeared as we are now using DDAS super fast storage! See example below:
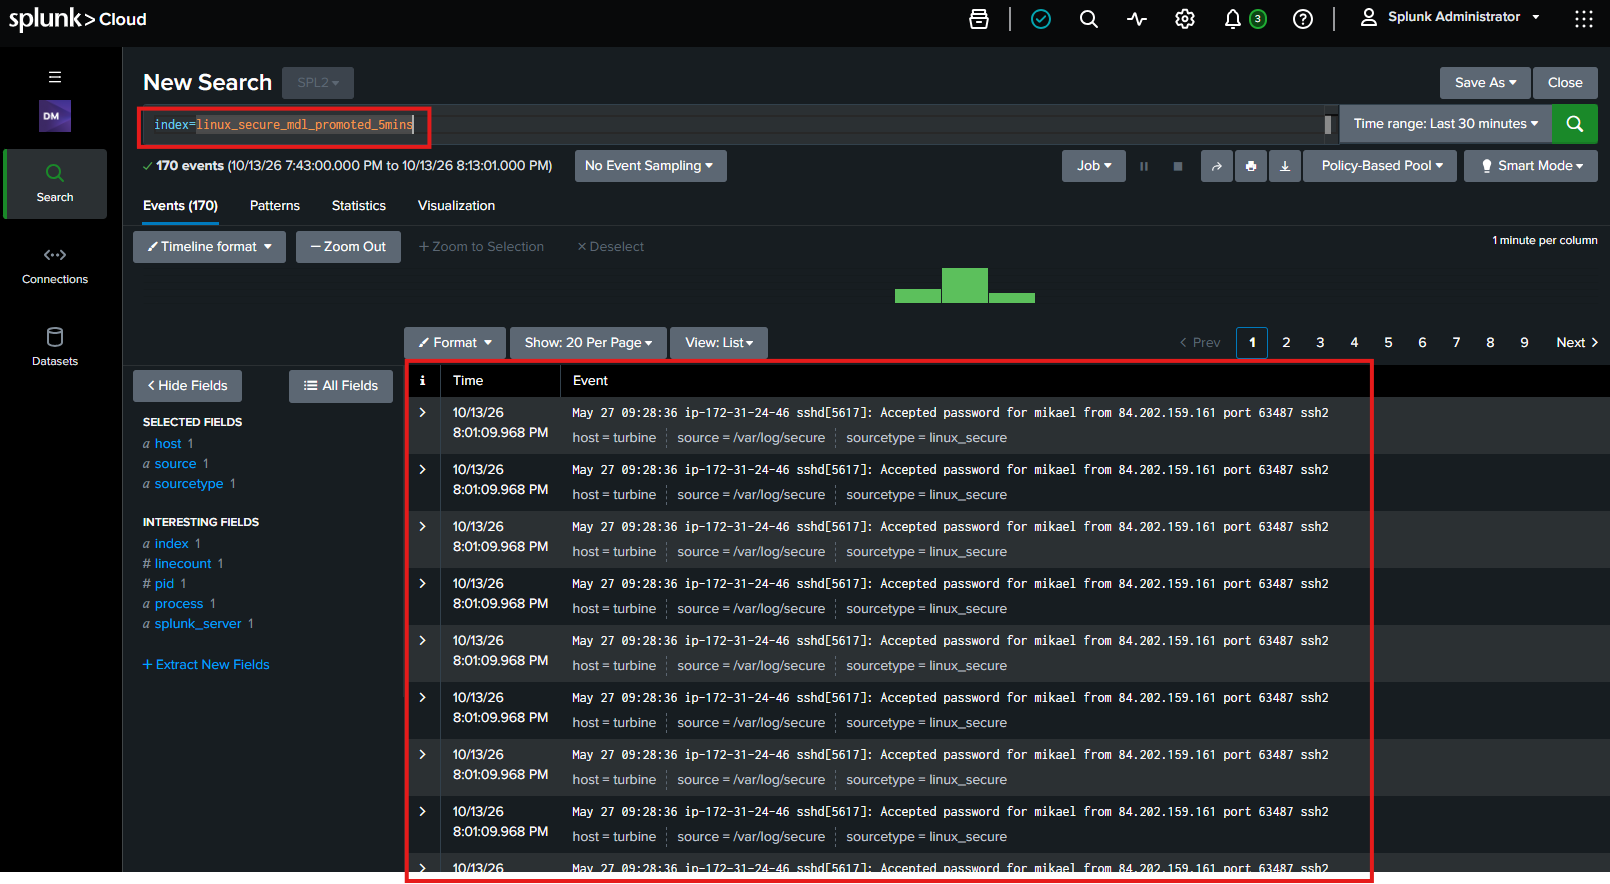
That is it! Congratulations we just promoted some data from a Machine Datalake Raw table into Splunk DDAS index for searching. How easy was that! That is it for this lab. Its time to move onto the next lab.