
Section Two: Creating Our First Blank Ingest Processor Pipeline
Log In to Splunk Cloud Services (SCS)
Log in to your SCS tenancyusing the link provided in your Splunk SHOW lab environment.
The portal should automatically authenticate using your cached credentials from your Splunk Cloud session. If authentication fails, ensure you are still logged into the Splunk Cloud instance used in Section One.
Once logged in, you will see the unified data management overview.
- Let's do a quick check of our destinations.
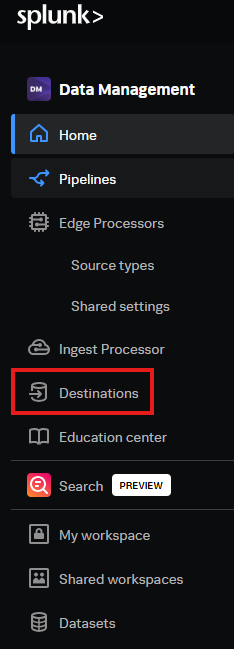
Select destinations on the left-hand menu.See exmaple below
You should see the splunk_indexer already exists. This destination is how we will send data through ingest processor into Splunk Cloud for indexing. See example below:
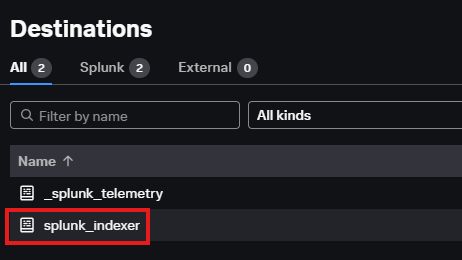
Now that we can see the splunk indexer already exists we can move onto our first pipeline.
You will see the section for Edge Processors. This is where you would go to manage your edge processors if you are using them. Splunk data management allows you to manage edge and ingest processors as well as pipelines all in the one single management interface!
- Select
Pipelinesfrom the left navigation menu.
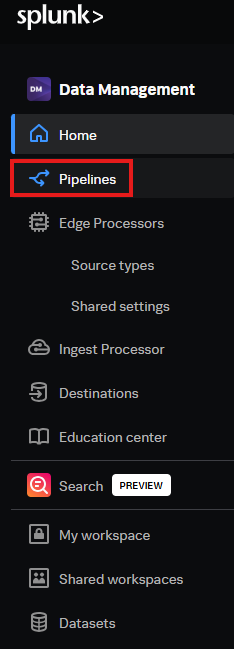
- Click the blue
+ New pipelinebutton in the top right of the screen.
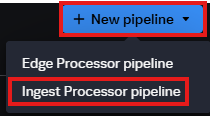
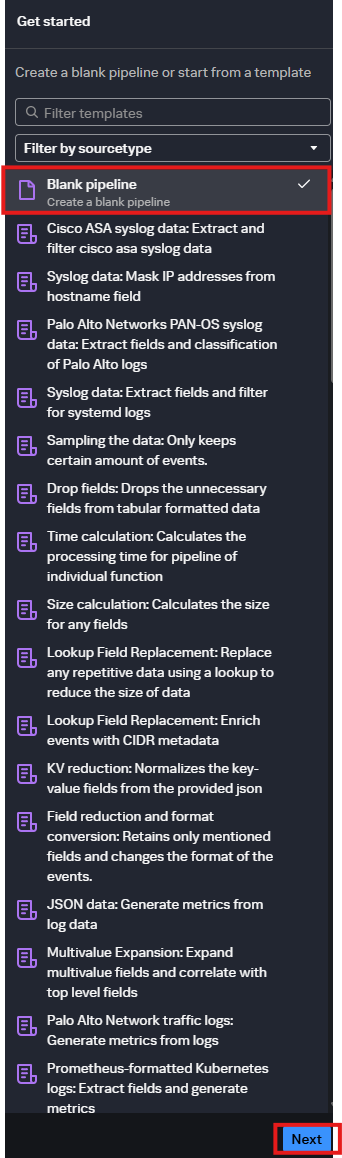
Welcome to the ingest processor pipeline wizard. From here you will see the major steps at the top and then on the right you can see a getting started section. Pause, take some time to have a look at all of the different templates out of the box we offer for different data sources. This is a great way to get started and save you lots of time.
- When ready, select
Blank pipeline, then clickNext.
From here we will see there is four ways we can partition (or intercept) our data before its indexed in Splunk. These are sourcetype, source, host and index (you may need to scroll to see this).
For this lab we are going to partition by index.
As you can imagine. What you select depends on your data. If we had selected sourcetype and we used a very common sourcetype then it would be more difficult to manage the data we care about or worse. We could manipulate the wrong data!
Seeing as all of our credit card data is going into the one index and no other data is also going into that index, we are ok to use index as partition type.
One thing to note as well in this TLDR section. The index value here is not data from an index, which might be your first thought. We are saying if data coming in has a metadata value set of index=xyz then we can match on that result.
- Select the
indexpartition option.
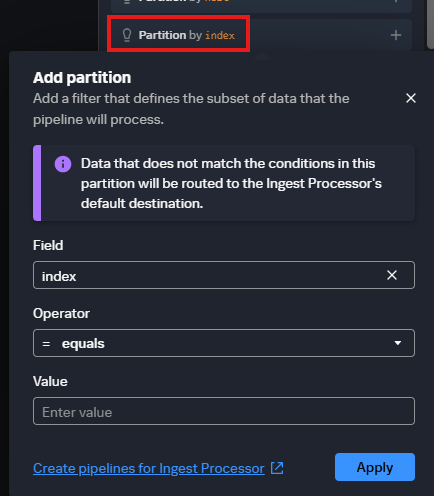
- In the Value field, copy and paste the following:
cc_trans_imBefore we click apply you will note we can use operators as well to do partition matches, eg is NULL or my favourite, is not NULL. These can help us to be more flexible in the value to match against in the index field.
Click Apply when ready.
From here you can see we have now set a partition in the wizard. See example below:
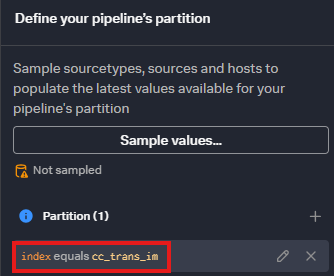
- When ready
click Next
From here the Ingest processor would like us to provide it some sample data to use for our pipeline. We have two options. We can either upload a sample of the data which will be used, or we can actually take a live sample from our real data set.
Let’s configure a live sample set.
Select Capture new snapshotfrom the options.- From here
copy and paste cc_transactions text below into the Name field.We will leave the rest of the defaults for maximum interval and events. See example below:
cc_transactions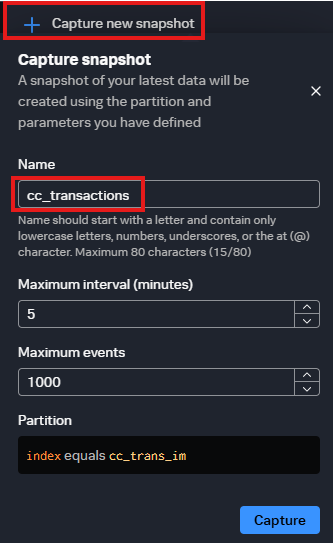
Click capturewhen ready.- We should now see our capture selected.
Click Nextfor our final step in the setup wizard.
The final step of the wizard is to select our destination. We already noticed earlier that we have splunk_indexer already configured as a destination.
- Go ahead and
select splunk_indexerfrom our list.
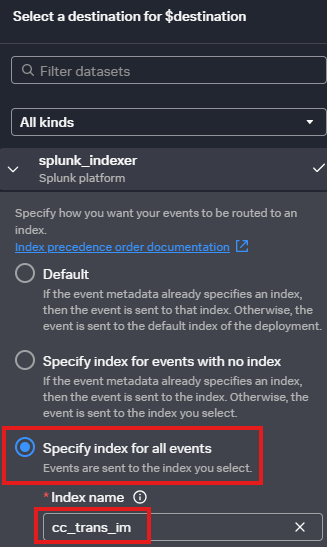
From here we will see three options. Read below for an explanation of each:
Default: Use the index field in the metadata (eg cc_trans_im). Otherwise it will use a default one set for the deployment.
Specify index for events with no index: This is used for circumstances when there is no metadata index is set as the data is coming in. When none is set then use the index you select here. Eg if metadata index is set to t-rex then the index is t-rex otherwise it will be set to what we say here.
Specify index for all events: This is the just overwrite everything setting and just send to an index we choose.
Which is the right answer for us? Pause for thinking time...
The most correct answer is Specify index for all events. This is because we are matching against an index field. If we were using host or sourcetype then there are potential different outcomes here. Because we are doing an exact match against an index. We are always having the index match.
All of this may not matter anyway if you explicitly set your index fields during a pipeline. Will make sense later.
- When ready
select Specify index for all eventsandselect the cc_trans_im index in the Index name fieldas the value. This is where we want to send the data after it is redacted. See example below:
Click Donewhen ready.
Pipeline editor
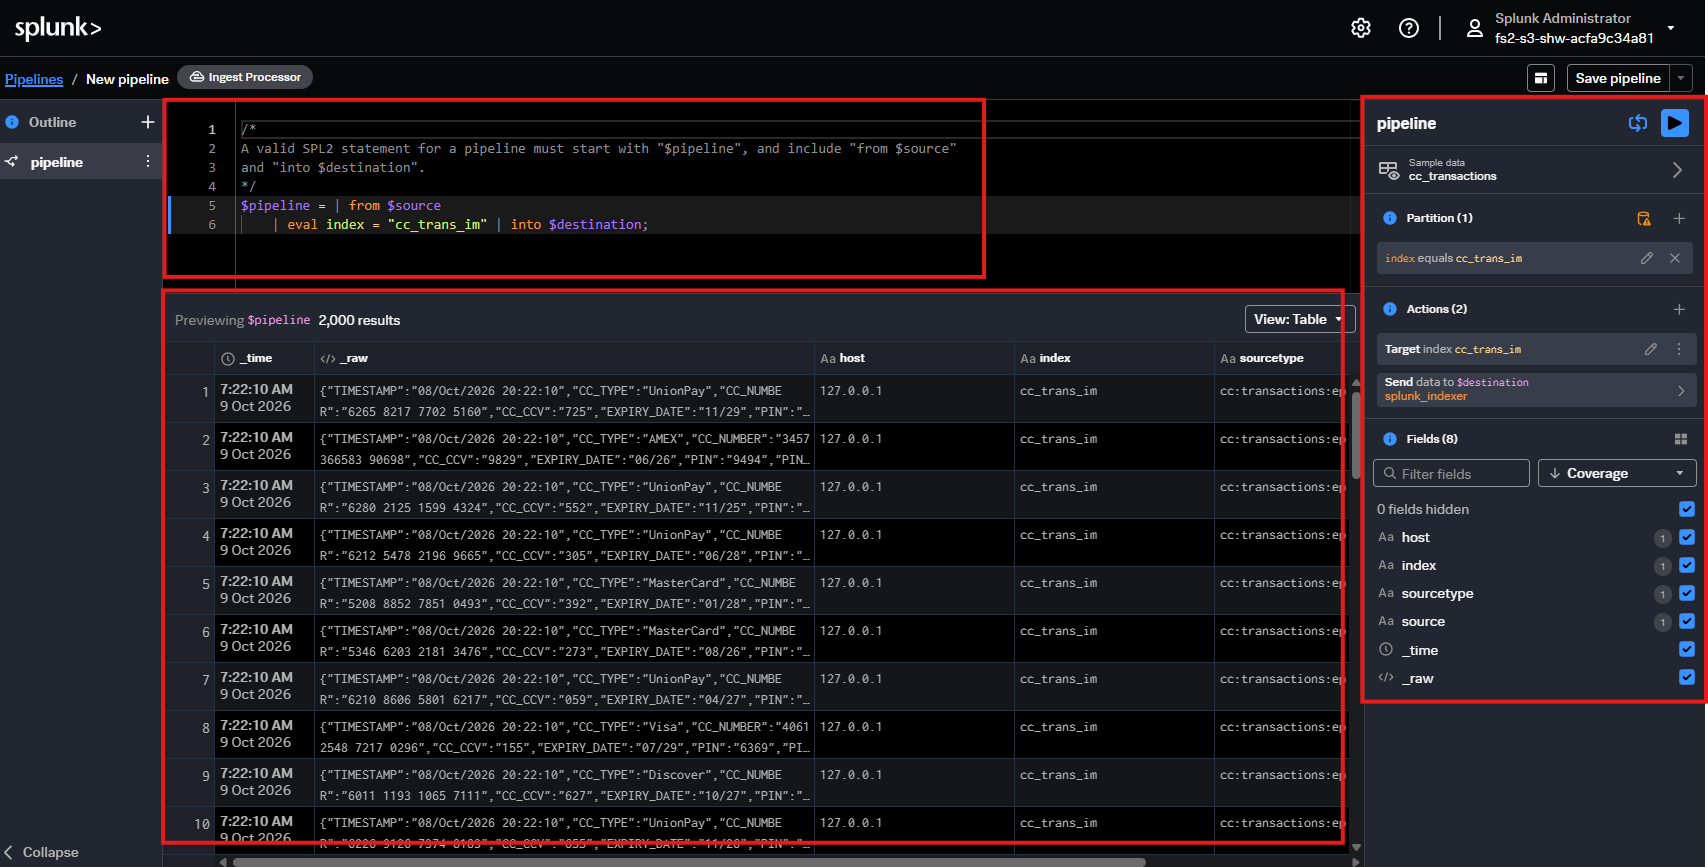
Welcome to the pipeline editor. There are three main sections on this screen:
- Top: Is your pipeline code
- Bottom: Is the preview of the results of your pipeline if applied.
- Right: Is the pipeline overview section showing you the setup of your pipeline.
See example below:
If you are doing this lab as part of an instructor led course then your instructor will explain this to you in more details on how ingest processor pipelines are made up.
Basically this pipeline is just taking our source (cc_trans_im index) data, setting the index of cc_trans_im again and piping it into our destination of Splunk.
$pipeline = | from $source
| eval index = "cc_trans_im" | into $destination;
Lastly, in the preview section you can see the event broken out into columns of _time, _raw, host, index, sourcetype and source.
Now it is time to start building out our requirements for the lab which were:
- Send the raw logs to a new special PII index called cc_trains_pii
- Filter and mask the original raw log
- Put that filtered and masked data back into the cc_trans_im index for the infrastructure monitoring team.