
Section Three: Build out our credit card transactions pipeline
It takes a while to learn how to build pipelines from scratch. But thankfully now days there are plenty of tools and examples to help. For this lab we will provide you everything you need but in future you can use examples we showed as part of the pipeline building or you can even use AI to generate a good starting point. Let’s start by splitting our data into two different indexes.
Building our first pipeline
Copy and paste the following code block **totally replacing** the existing code
$pipeline =
   | from $source
   | branch
   [
    | eval index = "cc_trans_im"
   ],
   [
    | eval index = "cc_trans_pii"
   ]
   | into $destination;
This pipeline will now branch the data into two streams. This function takes sections enclosed in hard brackets. Inside each bracket we are setting the output index value where splunk will route the data.
At this stage if we applied this pipeline all it would do it create a direct copy of the raw incoming data and send it to both indexes.
More info on the branch command can be found here
Now we have the basics down we can create a re-usable routine to start to strip out PII data.
Copy and replace the following code, again completely replacing your existing one
$pipeline =
   | from $source
   | branch
   [
    | drop_non_storable
    | eval index = "cc_trans_im"
   ],
   [
    | eval index = "cc_trans_pii"
   ]
   | into $destination;

function drop_non_storable($source) {
   return
   | from $source
       // Remove Track 1 Regex
       | eval _raw = replace(_raw, /,"TRACK1":"%B[0-9]{0,19}\^[A-Za-z0-9_ ]{2,26}\^[0-9]{7}[A-Za-z0-9_]*\?",/i,"")
       // Remove Track 2 Regex
       | eval _raw = replace(_raw, /"TRACK2":"[0-9]{13,19}=[0-9]{7}\?"/i,"")
       // Remove PIN BLOCK Regex
       | eval _raw = replace(_raw, /"PIN_BLOCK":"[0-9A-F]{16}",/i,"")
       // Remove CCV Regex
       | eval _raw = replace(_raw, /"CC_CCV":"[0-9]{3,4}",/i,"")
       // Remove PIN Regex
       | eval _raw = replace(_raw, /"PIN":"[0-9]{4}",/i,"")
}
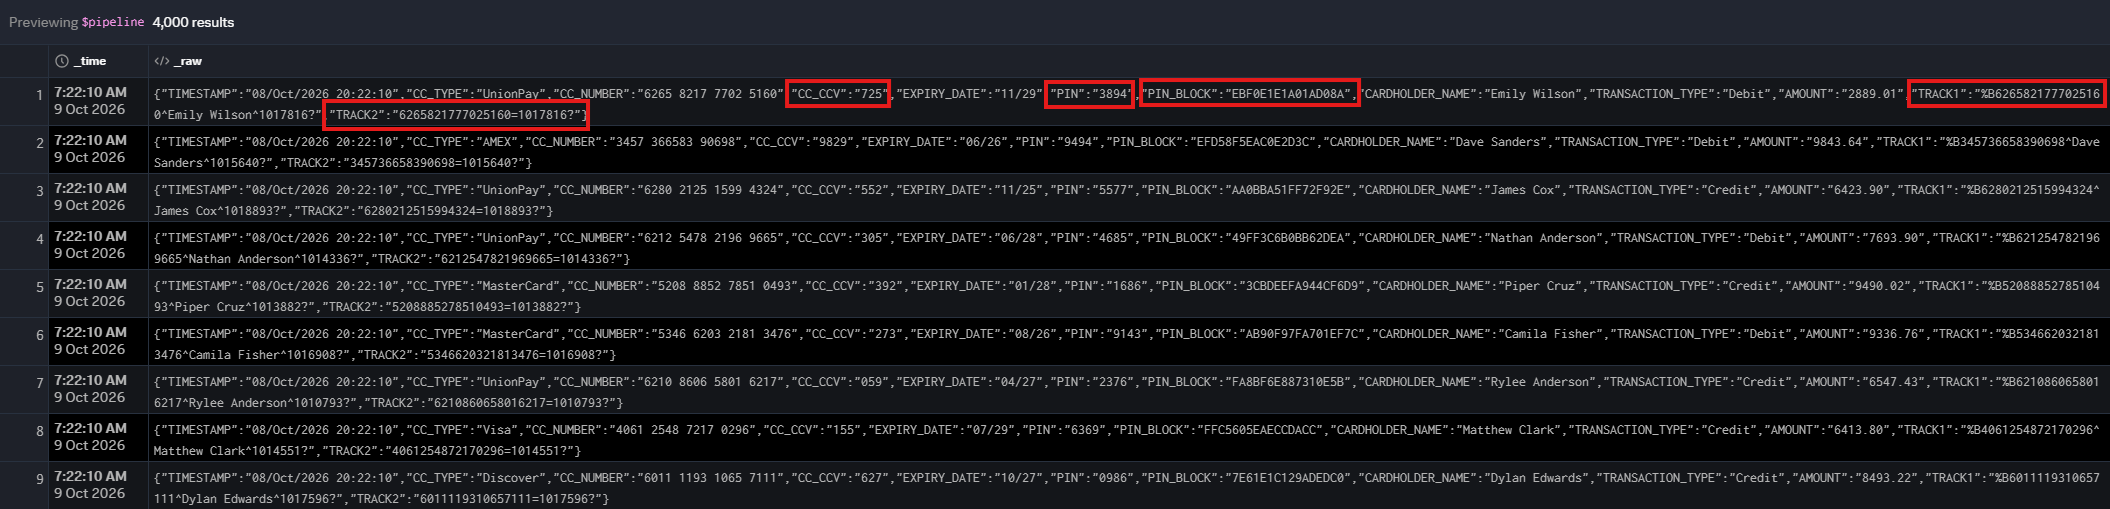
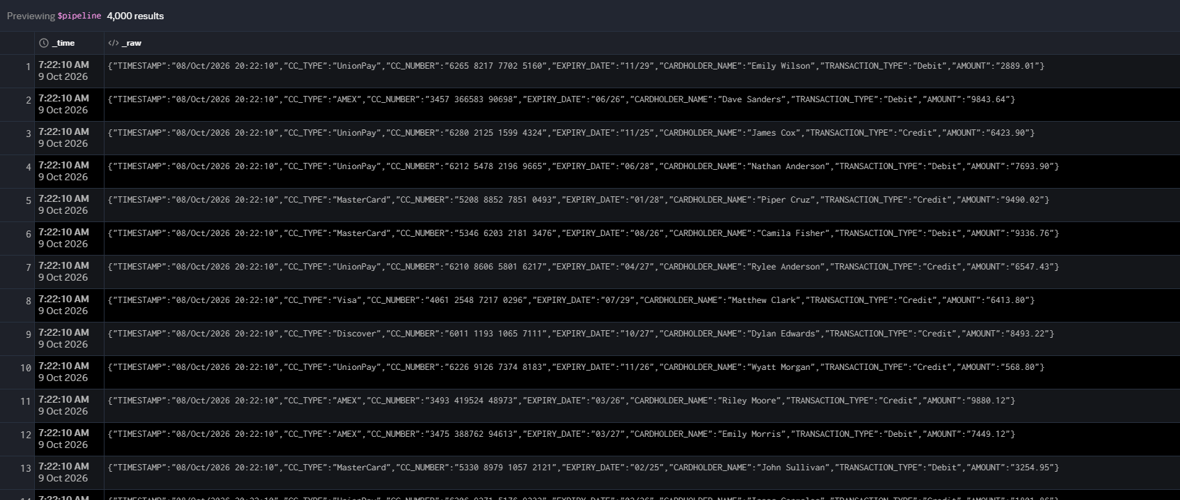
The new pipeline adds a sub-routine called drop_non_storable. We don’t expect you to understand exactly what it’s doing but basically as the text explains there are five regex blocks which run through the _raw event to drop PII data with text like TRACK1, TRACK2, PIN_BLOCK, CC_CCV and PIN.
That way the infrastructure monitoring team cannot see this data.
Now is a good time to look at what’s changed and show you the preview function.
- From the top right-hand corner
press the blue play button.See example below:
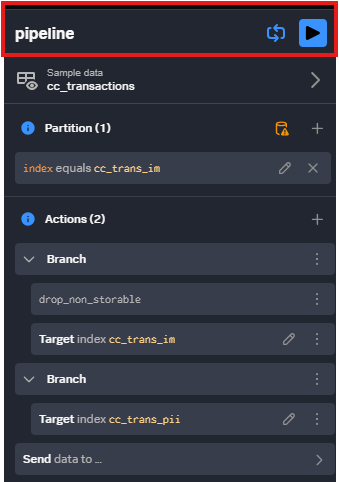
You will see when pressing the play button the preview section down the bottom changes, showing us what we implementing.
Below is a before and after so you can see easily what that code did.
BEFORE (see highlighted sections)
AFTER (see highlighted sections from before are gone!)
At any point you can go back and forth using // in front of the drop_non_storable function and pressing the preview button again. This will magically bring the original data back.
The good news is that if the business decides that nobody can have that data you can put it into both sections of the branch to remove it from both feeds.
Now let’s add another function to mask critical data from the infrastructure monitoring team index.
- Now
copy and replace the entire block of code again adding this new function
$pipeline =
   | from $source
   | branch
   [
    | process_pii $source display=false
    | drop_non_storable
    | eval index = "cc_trans_im"
   ],
   [
    | eval index = "cc_trans_pii"
   ]
   | into $destination;

function drop_non_storable($source) {
   return
   | from $source
       // Remove Track 1 Regex
       | eval _raw = replace(_raw, /,"TRACK1":"%B[0-9]{0,19}\^[A-Za-z0-9_ ]{2,26}\^[0-9]{7}[A-Za-z0-9_]*\?",/i,"")
       // Remove Track 2 Regex
       | eval _raw = replace(_raw, /"TRACK2":"[0-9]{13,19}=[0-9]{7}\?"/i,"")
       // Remove PIN BLOCK Regex
       | eval _raw = replace(_raw, /"PIN_BLOCK":"[0-9A-F]{16}",/i,"")
       // Remove CCV Regex
       | eval _raw = replace(_raw, /"CC_CCV":"[0-9]{3,4}",/i,"")
       // Remove PIN Regex
       | eval _raw = replace(_raw, /"PIN":"[0-9]{4}",/i,"")
}

function process_pii($source, $display: boolean = false) {
   return
   | from $source
       //Create Temp Fields to check CC Type and CC Numbers
       | eval CC_TYPE = _raw.CC_TYPE
       | eval CC_NUMBER = _raw.CC_NUMBER

       // Verify via Regex if CC Types match the CC Number
       | eval cc_regex = case(
           in(CC_TYPE, "Visa", "MasterCard", "UnionPay", "Discover"), "^\\d{4}\\s(\\d{4})\\s(\\d{4})\\s(\\d{4})",
           CC_TYPE == "AMEX", "^\\d{4}\\s(\\d{6})\\s(\\d{5})"
       )
       | eval is_cc_valid = match(CC_NUMBER, cc_regex)
       | where is_cc_valid == "true"
       // Apply Masking or Storing Filter on CC Number depending on CC Type
       | eval _raw = case(
           in(CC_TYPE, "Visa", "MasterCard", "UnionPay", "Discover") and $display,
               replace(
                   _raw, /(\d{4})\s(\d{2})(\d{2})\s(\d{4})\s(\d{4})/i, "\\1 \\2XX XXXX \\5"
                   ),
           in(CC_TYPE, "Visa", "MasterCard", "UnionPay", "Discover") and not $display,
               replace(
                   _raw, /(\d{4})\s(\d{2})(\d{2})\s(\d{4})\s(\d{4})/i, "XXXX XXXX XXXX \\4"
                   ),
           CC_TYPE == "AMEX" and $display,
               replace(
                   _raw, /(\d{4})\s(\d{2})(\d{4})\s(\d)(\d{4})/i, "\\1 \\2 XXXXX \\3"
                   ),
           CC_TYPE == "AMEX" and not $display,
               replace(
                   _raw, /(\d{4})\s(\d{2})(\d{4})\s(\d)(\d{4})/i, "XXXX XXXXXX X\\5"
                   )
           )
   // Drop the temp fields
   | fields - CC_TYPE CC_NUMBER cc_regex is_cc_valid
}- Once done,
press the preview button againand you should now see PII data for credit card numbers has blanked out! See example below:
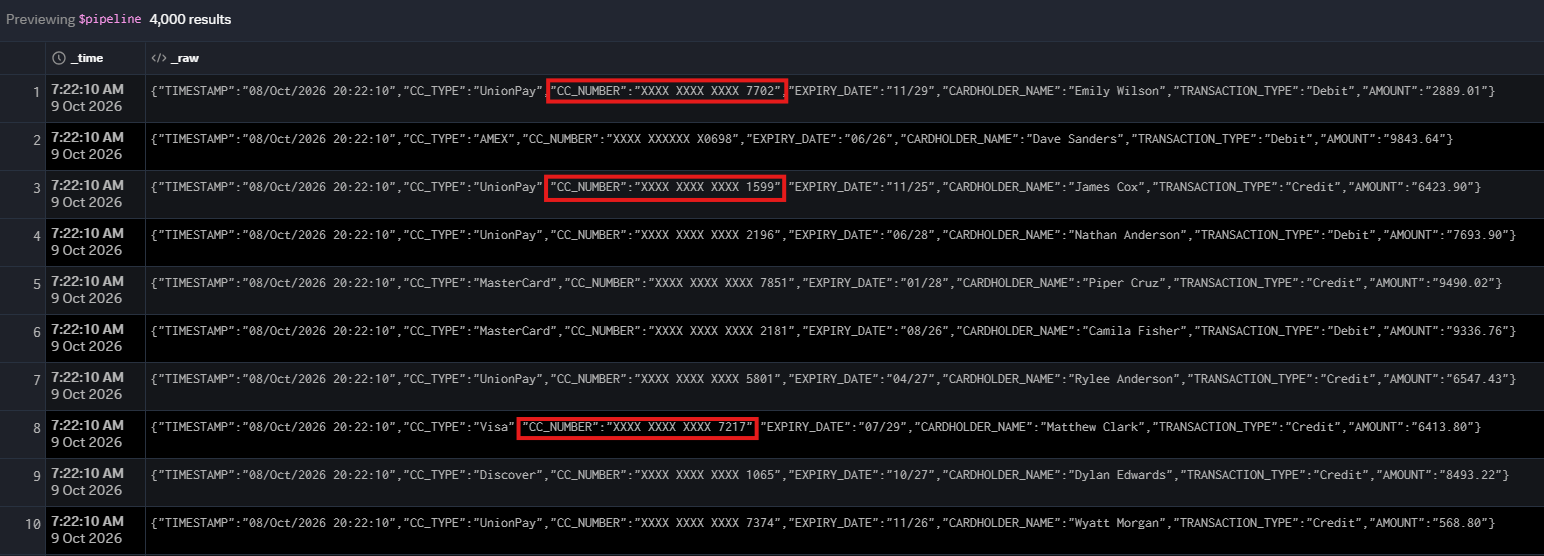
This function firstly creates a set of temporary rows for us to easily see the fields for CC_TYPE and CC_NUMBER. Then use regex to filter our the credit card numbers for credit card types.
Lastly, we then remove those temporary fields. This is left in for easily debugging things in the future.
This function is just an example and can easily be modified to remove additional data if required.
Lastly, before we save and apply our pipeline its worth having a final look at the right hand side of our screen. You should now see the structure of our partitions, functions and flow of the pipeline. See example below:
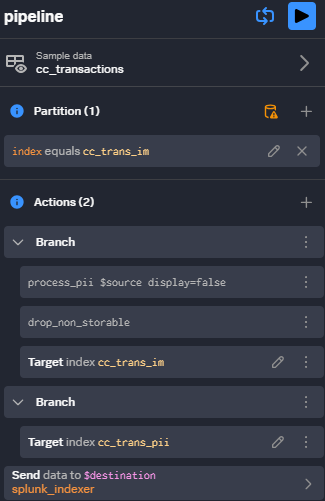
Now we are happy, let’s save our pipeline and apply it.
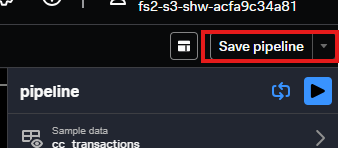
- On the top right-hand side
click the Save pipeline button.See example below:
- Copy and paste the name below into the pipeline name section. Adding an additional description if you like. See example below:
split_mask_filter_pii_cc_trans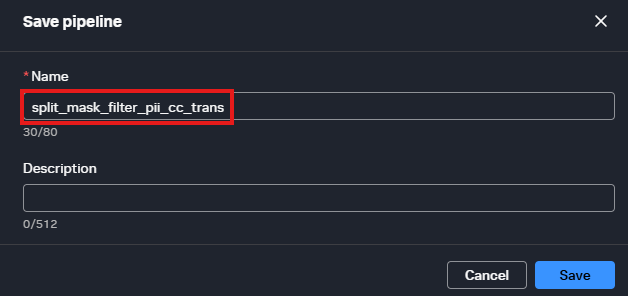
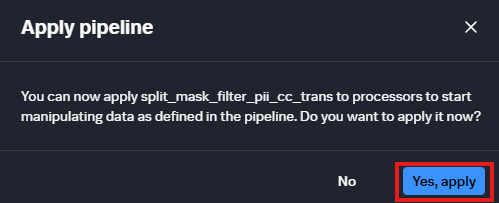
Click savewhen ready.- Now a prompt will ask if we wish to apply the pipeline. For this lab we would like to apply it now.
Click Yesto apply. See example below:
Now a prompt will quickly appear to view the pipeline. If you don’t click in time it disappears, then not to worry. We can go back to our pipelines easily!
Click the Splunk logo top left-hand side.Click pipelineson the left-hand side menu. See example below:
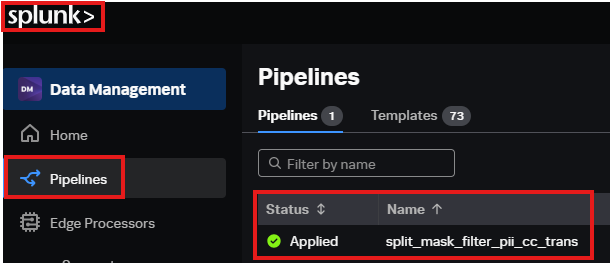
Congratulations, you have now built and applied your first pipeline. All that is left to do now is validate everything is doing as we thought! To do that we need to jump back into our Splunk console.