
Section One: Setup Amazon S3 destination in Splunk
Before we can route data to Amazon S3 in our Ingest Processor we need to configure what Splunk calls a connection to Amazon S3. This lab will take us through the process of doing this.
Configuring Amazon S3 connection in Splunk is not only for routing data into S3. This connection is a set of permissions which can be used for routing and searching data using Federated Search.
Let's kick things off!
Setting up Amazon S3 connection in Splunk
- From our Splunk Console.
Click Splunk Cloud logotop left-hand side. - From the left hand menu,
Click the Data Management app.See example below:
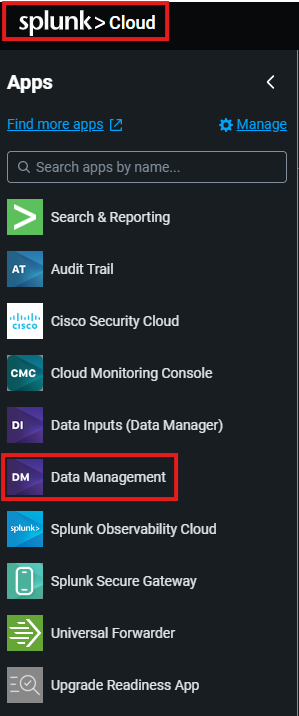
Welcome to the Data management app within Splunk. There is quite a lot to take in here but by the time you finish this workshop you will be very familiar with it all.
- `Click <--> Connections button on the left-hand menu.` See example below:
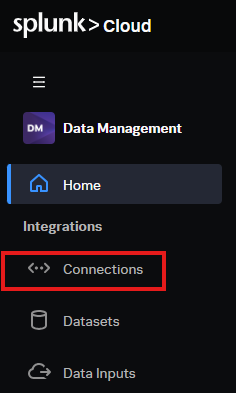
- On the connections screen,
Click the blue Create connection buttonon the right-hand side.
Splunk data management app allows you to create connections to many different data lakes. Eg Amazon S3, Snowflake and many more in the future!
This allows Splunk to connect and access the data in many different data lakes.
For this workshop we will only be using Amazon S3.
Select the Amazon S3 radio button.See example below:
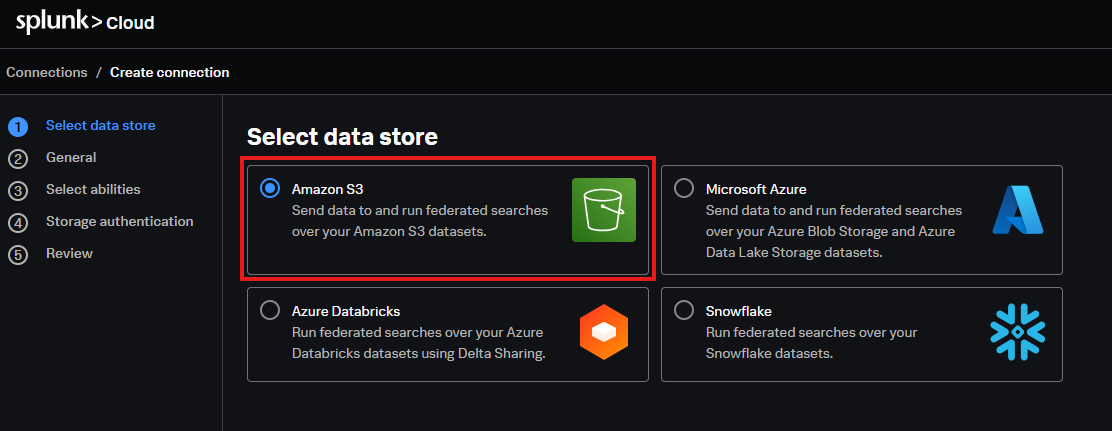
Click next
Some of the names used in the labs here were re-used from an existing full day T-REX workshop on Federated Search for Amazon S3.
If you are after a dedicated training day specifically for Federated Search for Amazon S3, ask your instructor for more information on this.
- On the General section fill out the following fields as described.
- Connection Name:
fs-s3-workshop - Description:
Connection to Amazon S3 - AWS accound id:
paste in AWS account id from your AWS console. See example picture below: - AWS region:
us-east-1
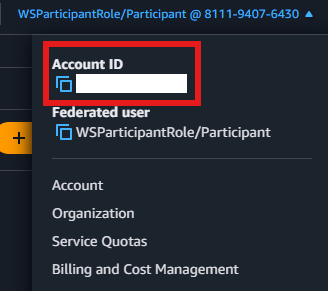
See example filled in General page below:
It is best practice to blank out the AWS account id for workshop pictures. No images in this lab will show the actual AWS account id.
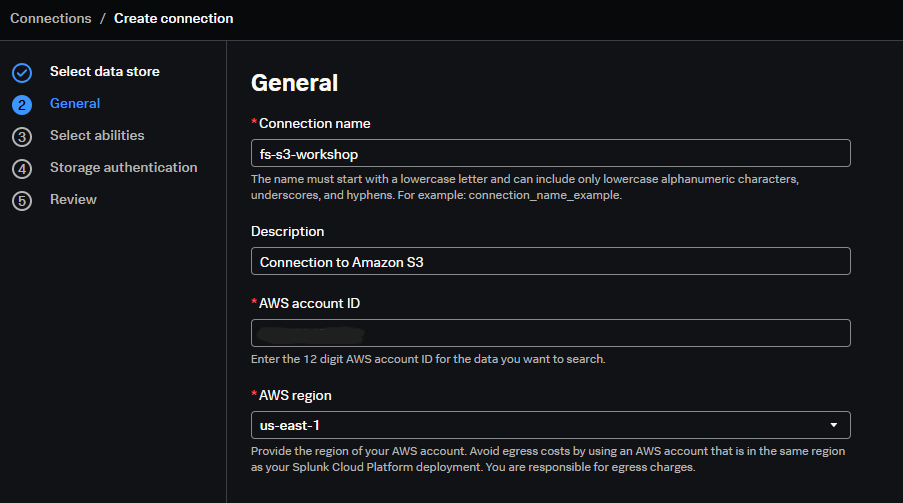
Click Nextwhen ready.
As we will use the federated search for Amazon S3 feature later in these labs we will configure this connection to have both ingest capability and federation capability.
- In the abilities page,
select Run Federated Searchandselect Send data from Ingest Processoroptions. See example below:
You will see the option around IAM Role (Recommended) and Access key appear. We will not go into heaps of details on those options but short answer is; because the Ingest processor is running inside Splunk's AWS tenancy, we can use AWS native authentication methods which are better and safer to use than long term access key authentication methods.
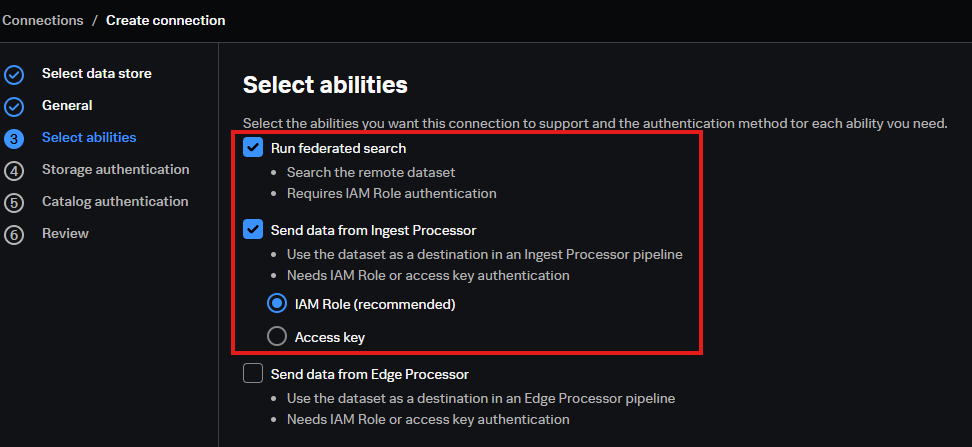
Click nextwhen ready.
You will now see a storage authentication section. This allows Splunk to authenticate into AWS. Follow the steps below to configure this in your AWS console. There will be a bit of swapping tabs in this section.
As part of this workshop your instructor would have explained how to login to your temporary Amazon account. These next steps assume you already have access and it is working correctly.
- Leaving the Splunk tab open, we need to append this trust policy to a pre-created role we have in our AWS workshop account.
From our AWS console search for and select IAM.

- From your IAM screen
select Roles on the left hand side. In the search section enter Splunk, and you should see a filtered list of two pre-created roles as part of the workshop. See example below:
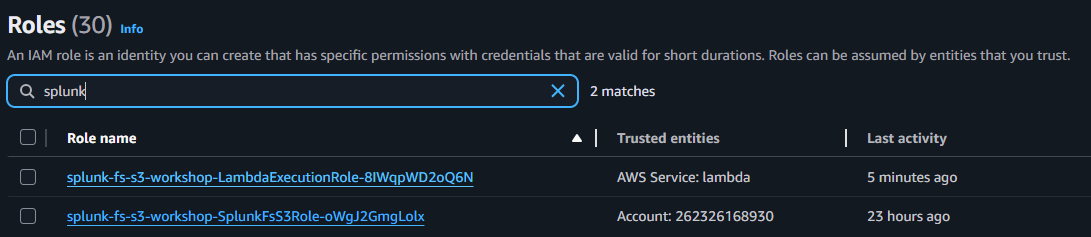
Select the SplunkFs-S3rolefrom the list eg splunk-fs-s3-workshop-SplunkFsS3Role-xxx- From here,
select the Trust Relationships tabwhere you should see a sample trust relationship already. Click Edit trust policyPaste in trust policy from Splunk **replacing the old one**into the editor and thenclick Update Policywhen ready. See example below:
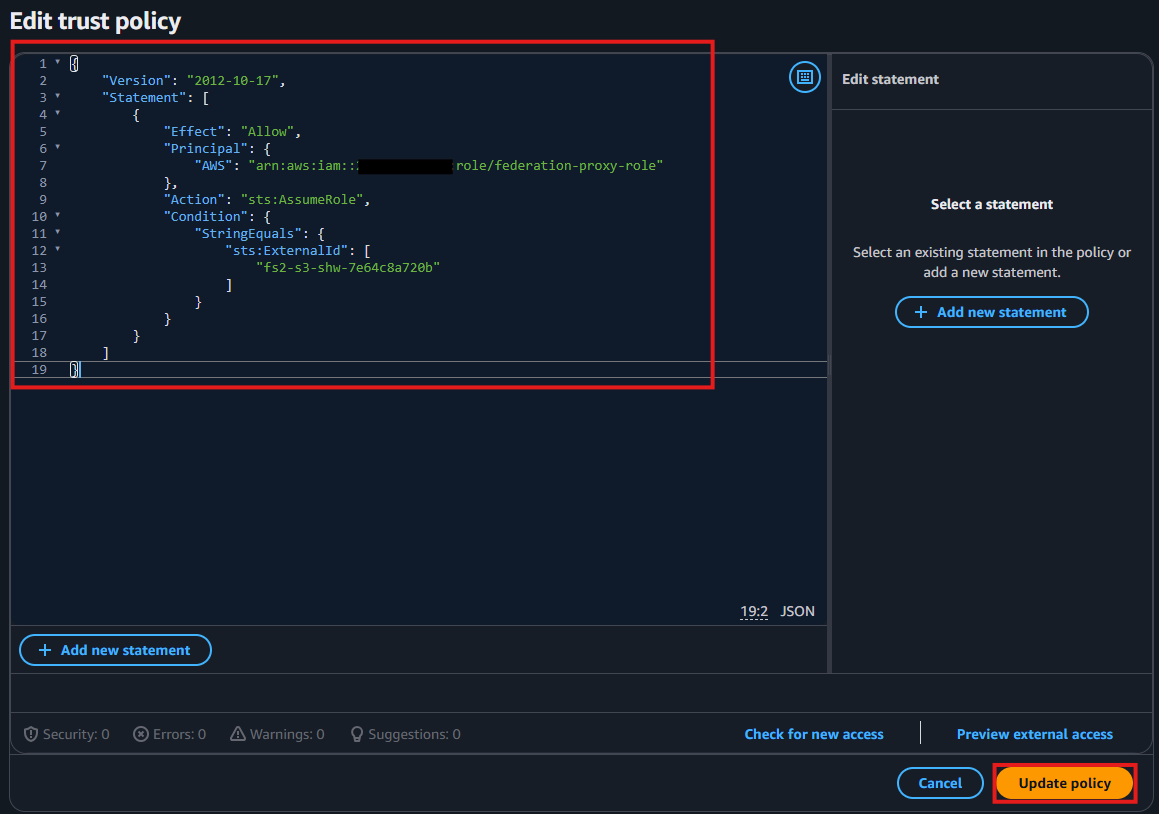
- From here we need to copy the ARN of the role.
Click the blue boxes next to the ARN section.See example below
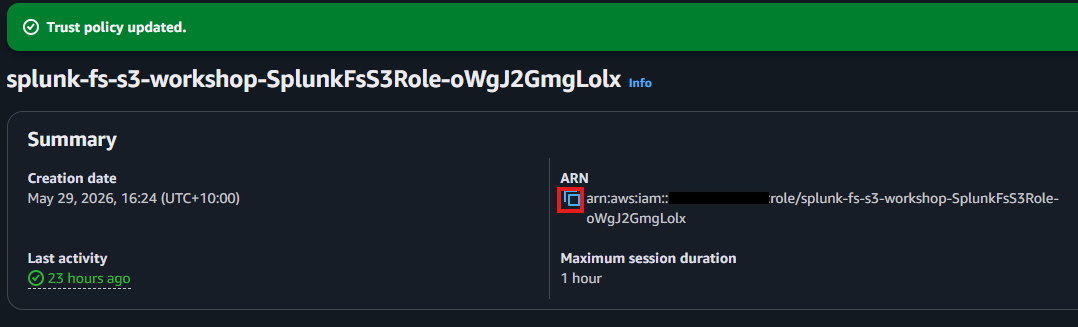
- Return to the Splunk screen and
paste the role ARN into the section where it asks for it.See example below:
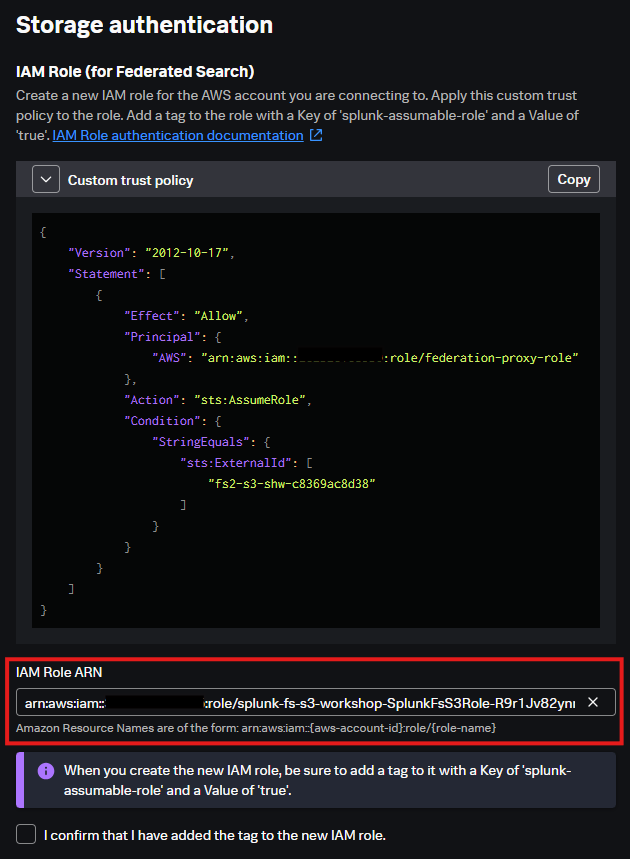
You will note an important message (see example below) about adding a tag to the role. This is used as part of the validation the Splunk side.

- The last step on the storage authentication screen is to add the tag to the AWS IAM role.
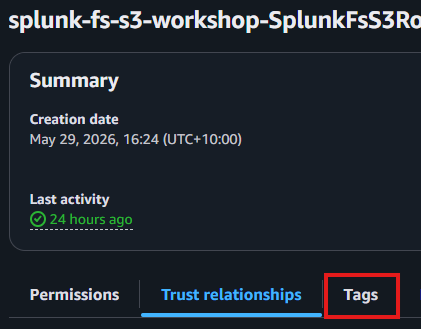
On your AWS screen where your role was being configured, select the Tags tab.See example below:
- You should now be able to
click the Add new tag button in the middle of the screen.On thenext screen Click Add new tag. Check your splunk screen for the correct tag name and value and enter this in your AWS Tag screen.eg key is splunk-assumable-role and value of true. See example below:

- Once confirmed
Click Save Changes buttonto save your tag.
Once saved the tag should be show in your list.
Back in the Splunk console you can now tick the box confirming you have added the tag and click Next to continue.- On the Catalog Authentication page
Select No for Apache Iceberg RESToptions andClick next when ready.
Apache Iceberg REST authentication is a type of catalog structure which we aren't using at this point in the lab.
- Review you settings and when happy,
Click create - Once done, We should see our new connection in the list. See example below:
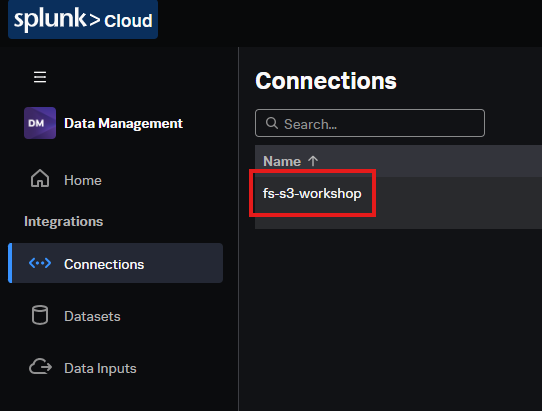
It may already be selected but you can click on the connection itself to get further information about that connection on the right-hand side.
Well done! We have now created our first connection in the data management app. We can now move onto the next section of the lab. Creating our S3 bucket and routing the Cisco ASA logs to that bucket.